
A portable workstation can look polished on a kitchen table, hotel desk, or small home office—but color accuracy is easy to lose when the setup is rushed. A screen that is too bright, angled toward a window, running in a vivid display mode, or connected through an underpowered cable can make photos look warmer, darker, or more saturated than they really are. The result can be disappointing prints, mismatched paint or fabric selections, and files that look different when viewed on another device.
A color-accurate portable setup does not require a permanent studio. It does require a stable work surface, controlled light, correct display settings, and a simple routine for checking color before important work. The steps below work for a laptop-only setup or a laptop paired with a portable monitor, including compact touchscreen monitor-and-keyboard units. In 2026, many portable displays offer convenient USB-C connections, but convenience alone does not guarantee consistent color.
As an Amazon Associate we earn from qualifying purchases at no extra cost to you.
What You Need
| Item | Why | Optional? |
|---|---|---|
| Laptop with current operating system | Runs your design, photo, office, or production software and manages display profiles. | No |
| Portable monitor, 12 to 16 inches | Creates extra workspace for reference images, editing panels, client previews, or documents. | Yes |
| Quality USB-C or HDMI cable, 3 to 6 feet | Provides a stable video signal; some USB-C displays also receive power through the same cable. | No, if using an external display |
| USB-C power adapter, typically 45 to 100 watts | Helps prevent dimming, battery drain, or unstable connections when powering a laptop and monitor. | Recommended |
| Portable monitor stand or laptop riser | Raises screens closer to eye level and keeps viewing angles consistent. | Recommended |
| Colorimeter or calibration device | Measures the display and creates a custom color profile for more dependable color work. | Recommended for photo, print, and design work |
| Neutral desk lamp, 4000K to 5000K | Provides balanced task lighting without making the workspace look excessively yellow or blue. | Recommended |
| Microfiber cloth | Removes fingerprints and dust that can make the screen appear hazy. | No |
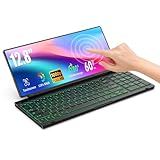
If you want an all-in-one travel-friendly accessory, a 12.8-inch touchscreen portable monitor with keyboard can be useful for compact desks and carry-on work setups. At about $219.97, it sits within a typical $180 to $300 range for specialized portable displays and keyboard combinations. Before buying, confirm its connection type, power requirements, stand design, and whether its screen settings allow adjustment of brightness, color temperature, and saturation.
Step-by-Step
-
Choose a stable, low-glare work surface (5 minutes)
Start with a desk or table at least 24 inches deep and 36 inches wide if you are using a laptop plus a portable monitor. This gives you room to keep screens 20 to 30 inches from your eyes without crowding the keyboard or cables. Avoid soft bedding, couches, or uneven tables; they make it harder to hold a consistent viewing angle and can block laptop ventilation.
Place the workstation so windows are to the side rather than directly behind or in front of the screens. A bright window behind you can cause reflections, while a window directly in front can make the display appear too dim. If you cannot change the desk position, close sheer curtains or use a simple matte screen hood.
-
Position the laptop and portable monitor (5 to 10 minutes)
Set the main screen directly in front of you. If the portable monitor will be your primary color-review screen, center it instead and place the laptop slightly to one side. Keep the top third of each display at or just below eye level. A laptop riser can help, but use an external keyboard and mouse if raising the laptop makes its built-in keyboard uncomfortable.
Angle the screens so they face you squarely. Many LCD panels shift in brightness and color when viewed from an angle, especially on compact portable models. Keep both displays tilted back roughly 90 to 110 degrees from the desk surface, then make small adjustments until reflections disappear.
-
Connect power and video correctly (5 minutes)
Use the cable supplied with the monitor only if it is rated for the power and video connection you need. For USB-C setups, connect the monitor to a port that supports video output, not just charging. If the monitor has a separate power input, connect it to a wall adapter rather than relying only on laptop battery power during color-critical work.
A 65-watt USB-C charger is often sufficient for a light laptop-and-monitor setup, while larger laptops may need 90 or 100 watts. If the screen flickers, disconnects, or suddenly lowers brightness, connect dedicated power before troubleshooting software settings.
-
Turn off automatic image-changing features (10 minutes)
Open the display settings on both the laptop and portable monitor. Disable night-light modes, blue-light reduction, automatic brightness, adaptive contrast, dynamic color, “vivid” mode, and battery-saving display dimming. These features can be comfortable for casual use, but they change the appearance of whites, shadows, and skin tones.
Select a standard or sRGB-style picture mode if the monitor offers one. Avoid modes labeled Game, Cinema, Dynamic, or Enhanced unless you are using the display for entertainment. Set the monitor’s sharpness control to its neutral or default position; excessive sharpness can create halos around text and image edges.
-
Set practical brightness and color temperature (10 minutes)
For an average indoor workspace, begin around 100 to 140 cd/m² if your display provides a brightness measurement. If it does not, use a visual approach: lower brightness until a white document looks like paper under your desk lighting rather than a glowing light source. In a brighter room, you may need a higher setting, but do not compensate for glare by turning the display excessively bright.
Choose a 6500K or D65 white point when available. It is a common target for screen-based design and photo work. Keep the same general white point on your laptop and portable display so a white background does not look creamy on one screen and bluish on the other.
-
Calibrate and profile the display (20 to 40 minutes)
For important design, photography, illustration, or print decisions, use a colorimeter. Let the display warm up for at least 20 minutes first. Run the calibration software with room lighting in its normal working condition, following the device instructions for target brightness, white point, and gamma.
The calibration process creates an ICC display profile, which tells your operating system how that specific panel reproduces color. Calibrate each screen separately. Do not assume that two displays with the same model number will look identical; individual panels can vary.
-
Check real-world files before final approval (5 minutes)
Open a known reference image containing neutral grays, skin tones, bright colors, and shadow detail. Compare the laptop and portable monitor from the same seated position. They do not need to look perfectly identical, but obvious differences in warmth, brightness, or saturation should be corrected before you edit final files.
For print work, use soft-proofing in your design or photo software when available, then review a small test print under neutral lighting. Screen calibration improves consistency, but paper stock, ink, printer condition, and room lighting still affect the final result.
Mistakes to Avoid
- Working beside an uncovered sunny window. Even a well-calibrated display cannot overcome harsh reflections and rapidly changing daylight.
- Using maximum brightness by default. Overly bright screens often lead to files that are edited too dark for other viewers or for print.
- Leaving Night Shift or blue-light filtering on. These settings intentionally shift white balance and are not suitable for color review.
- Comparing screens from different angles. Sit centered to each display when judging color, especially with smaller portable panels.
- Using inexpensive or damaged cables. A loose connection may cause flicker, intermittent black screens, or reduced functionality.
- Assuming “HDR” or “vivid” means accurate. Those modes can make content look dramatic while moving it away from a dependable reference appearance.
How Often
Clean the screen with a dry microfiber cloth every week or whenever fingerprints become visible. Recheck brightness and display modes whenever you move the workstation to a new room, change from daylight to nighttime work, or connect a different power source.
Calibrate a portable display every 4 to 8 weeks if you use it for paid photo, design, product-color, or print work. For occasional home use, every 3 to 6 months is usually reasonable. Calibrate again immediately after a major operating-system update, a monitor reset, or a noticeable change in display appearance.
When to Call a Pro or Replace
Call a computer technician or monitor service professional if the display repeatedly disconnects with known-good cables and power adapters, shows persistent flickering, develops broad color bands, or has a swollen battery or overheating power component. Stop using any device with a damaged charging port, frayed cable, burning smell, or unusually hot power brick.
Consider replacing the monitor if it cannot hold a stable brightness setting, has large patches of uneven backlighting that interfere with your work, or no longer supports the connection standard your laptop requires. For color-critical work, replacement is also sensible when calibration software cannot produce a usable profile or when the screen’s color shifts noticeably across the panel.
FAQ
Can a portable monitor be color accurate enough for photo editing?
Yes, for many editing tasks, provided it has adjustable settings, is used in controlled light, and is calibrated with a colorimeter. For final print matching or highly color-sensitive commercial work, verify important files on a larger calibrated reference display and with a physical proof.
Should I use the laptop screen or portable monitor as my main display?
Use the screen that calibrates most consistently and is easiest to view without glare. A portable monitor may be better if it has more useful controls and a stable stand. If your laptop has a higher-quality panel, keep the laptop as the primary editing screen and use the portable monitor for tool panels and reference material.
Why do my two screens look different even after calibration?
Differences in panel type, screen coating, brightness capability, viewing angle, and age can remain after calibration. Match white point and brightness first, then judge the displays from a consistent position. Calibration improves predictability; it does not make different hardware physically identical.
Do I need a colorimeter for everyday home-office work?
No. For email, spreadsheets, browsing, and general remote work, use standard color mode, moderate brightness, and good lighting. A colorimeter becomes worthwhile when you regularly edit photographs, create graphics, select finishes or textiles from digital images, or send files to print.
Related guides
- Alienware 16 Aurora RTX 5070 Review: Display, Portability and Configuration Gaps
- Lenovo Legion Pro 7i Gen 10 Review: 64GB RAM and Dual-SSD Configuration
- MSI Katana 15.6-inch RTX 5050 Review: Configuration Strengths and Upgrade Unknowns
- ASUS ROG Strix SCAR 16 G635LX-XS97 Review: Display Ambition, Upgrade Questions


