
Gaming laptops need a different approach than desktops in the Nvidia Control Panel. You are balancing raw frame rate against thermals, battery drain, and the quirks of hybrid graphics. The goal is not to flip every setting to maximum performance, but to reduce input lag, keep frame times consistent, and let your GPU boost reliably without hitting a power or thermal wall. As of early 2026, the most effective strategy is to let the game engine handle resolution scaling and anti-aliasing, use the Control Panel to enforce low-latency, power-aware defaults, and avoid global overrides that force the discrete GPU to fight your laptop’s Optimus or Advanced Optimus logic.
This guide gives you a safe, reversible baseline that works across most RTX 30, 40, and 50-series gaming laptops, then explains what each setting actually does so you can tune for your specific hardware tier and the games you play.
As an Amazon Associate we earn from qualifying purchases at no extra cost to you.

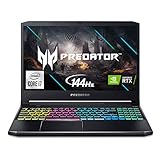


Top 3 picks at a glance
Quick Recommended Settings
| Setting | Recommended Value | Why |
|---|---|---|
| Image Scaling | Off (use DLSS / in-game scaler instead) | Avoids double-scaling blur and keeps the render pipeline native |
| Ambient Occlusion | Off | Expensive for minimal visual gain; let the game control it |
| Anisotropic Filtering | Application-controlled | Modern engines implement it more efficiently than a forced override |
| Antialiasing – FXAA | Off | Blurs the image and conflicts with TAA/DLAA |
| Antialiasing – Gamma Correction | On | Default correct behavior, leave enabled |
| Antialiasing – Mode / Setting | Application-controlled / None | Prevents forced MSAA that tanks laptop GPU load |
| CUDA – GPUs | All | Ensures all CUDA cores are available for games and creative apps |
| Low Latency Mode | On (Ultra for competitive shooters) | Reduces render queue depth to cut input lag |
| Max Frame Rate | Off (or 3 fps below display refresh for low-latency cap) | Use only if you need a global limiter; otherwise use in-game cap |
| Monitor Technology | G-SYNC Compatible (if panel supports it) | Enables variable refresh rate to eliminate tearing without V-Sync lag |
| Multi-Frame Sampled AA (MFAA) | Off | Deprecated and can cause shimmering with modern AA |
| OpenGL Rendering GPU | Auto-select or your Nvidia GPU | Fixes rare OpenGL games launching on integrated graphics |
| Power Management Mode | Normal (Prefer Maximum Performance per-game if needed) | Normal prevents idle high clocks/heat; per-game override for stuttery titles |
| Preferred Graphics Processor | Auto-select (or High-performance Nvidia processor on MUX laptops) | Respects Optimus/Advanced Optimus on most laptops |
| Shader Cache Size | Driver Default or 10 GB | Reduces stutter from shader recompilation; stored at C:\Users\YourName\AppData\Local\NVIDIA\DXCache and GLCache |
| Texture Filtering – Anisotropic Sample Optimization | Off | Minor quality loss for negligible gain on laptops |
| Texture Filtering – Negative LOD Bias | Clamp | Prevents texture shimmer when anisotropic filtering is overridden |
| Texture Filtering – Quality | High Performance or Quality (see tier section) | Impacts sharpness vs. power; Quality for 4060 and above |
| Texture Filtering – Trilinear Optimization | On | Safe performance win with no visible difference |
| Threaded Optimization | On | Allows multi-threaded games to better utilize the CPU |
| Triple Buffering | Off | Only relevant for OpenGL with V-Sync on; adds lag |
| Vertical Sync | Off (Use G-SYNC + in-game cap) or On for no-VRR panels | Global V-Sync on adds input lag; better handled in-game if needed |
| Virtual Reality Pre-Rendered Frames | 1 | Lowest latency for VR without starving the GPU |
Apply path: Right-click desktop > Show more options > NVIDIA Control Panel > Manage 3D Settings > Global Settings tab. Change values, click Apply. To test quickly, press Alt + Z to open the GeForce Experience overlay and check performance stats, or use Alt + R for the performance overlay if enabled.
Setting-by-Setting
Low Latency Mode: On vs. Ultra
What causes it: By default the CPU can prepare 1-3 frames ahead of the GPU. That queue smooths frame time but adds input lag.
How to check: In Manage 3D Settings > Global Settings, find Low Latency Mode. If Off, you are queuing frames. In competitive shooters, this feels like mouse delay.
What to do: Set Low Latency Mode to On for a balanced reduction in latency across all games. For Valorant, Counter-Strike 2, Overwatch 2, or Fortnite on high-refresh panels, test Ultra. If you use Nvidia Reflex in-game (found in Graphics or Gameplay settings), leave Low Latency Mode to On or Off — Reflex supersedes it and Ultra can conflict.
How to undo: Return to Manage 3D Settings > Global Settings > Low Latency Mode > Off > Apply. If you enabled Reflex in-game, you can keep the Control Panel setting Off.
Power Management Mode: Normal vs. Prefer Maximum Performance
What causes it: On Normal, the driver allows clocks and voltage to drop at idle or in light loads, saving heat and battery. Prefer Maximum Performance holds boost clocks higher even when not fully utilized.
How to check: Monitor clocks with HWInfo64 or GPU-Z while idle on desktop. If your GPU stays above 1500 MHz at 40C doing nothing, a global Maximum Performance setting is likely active.
What to do: Keep Global Settings on Normal. For specific games that show clock fluctuation stutter (common in DX11 titles like older Ubisoft games), go to Program Settings tab > select the game exe > set Power Management Mode to Prefer Maximum Performance > Apply. This limits heat to that game only.
How to undo: In Program Settings, set the affected game back to Use global setting (Normal), or in Global Settings revert to Normal. No reboot required.
Vertical Sync and Monitor Technology (G-SYNC)
What causes it: V-Sync forces the GPU to wait for the display refresh, removing tearing but adding up to a full frame of latency. G-SYNC Compatible displays vary refresh to match the GPU.
How to check: In Nvidia Control Panel > Display > Set up G-SYNC, see if Enable G-SYNC, G-SYNC Compatible is checked and if your internal panel is listed as G-SYNC Compatible. Check Windows Settings > System > Display > Advanced display for refresh rate, e.g., 144 Hz, 165 Hz, 240 Hz.
What to do: If you have G-SYNC: Enable G-SYNC for full screen mode, set Monitor Technology to G-SYNC Compatible, set Vertical Sync to Off globally, and cap frames 3 fps below max refresh using either Max Frame Rate or better, the in-game limiter (e.g., 141 fps cap for 144 Hz). If you have no VRR: Leave Monitor Technology on Fixed Refresh, set Vertical Sync to Use the 3D application setting, and enable V-Sync only in-game where tearing is unbearable.
How to undo: Set Vertical Sync back to Use the 3D application setting and disable the frame rate cap in Max Frame Rate > Off > Apply. In Set up G-SYNC, uncheck Enable G-SYNC.
Max Frame Rate and Background Application Max Frame Rate
What causes it: Uncapped frame rates on laptops cause unnecessary power draw, fan noise, and thermal throttling, especially in menus where fps can spike to 300+.
How to check: Open Manage 3D Settings > Global Settings. Max Frame Rate defaults to Off. Background Application Max Frame Rate defaults to Off.
What to do: For most users, leave Max Frame Rate Off globally and use the in-game fps limiter (lowest latency). If a game has no limiter, set Max Frame Rate to your target, e.g., 60, 120, or 141 for 144 Hz panels. Set Background Application Max Frame Rate to 30 fps to save power when alt-tabbed. Range is 20 to 1000 fps in steps of 1.
How to undo: Set both to Off > Apply.
Texture Filtering Quality, Trilinear Optimization, and Anisotropic Optimization
What causes it: Texture filtering determines how sharp textures look at angles. Higher quality modes sample more accurately but cost more power.
How to check: In Global Settings, find Texture Filtering – Quality, – Trilinear Optimization, and – Anisotropic Sample Optimization.
What to do: Set Quality to High Performance if you are thermal-limited, or Quality if you have headroom. Leave Trilinear Optimization On (free performance). Leave Anisotropic Sample Optimization Off to avoid subtle texture aliasing. Keep Negative LOD Bias on Clamp. Value range for Quality is High Performance, Performance, Quality, High Quality.
How to undo: Set Quality back to Quality, Trilinear Optimization to On, Anisotropic Sample Optimization to Off via Restore Defaults or manual selection.
Shader Cache Size
What causes it: Shaders compiled on first launch are cached to disk. A small or disabled cache causes stutter on subsequent launches as shaders recompile.
How to check: In Global Settings > Shader Cache Size. Default is Driver Default (typically 1 GB on older drivers). Check disk usage at C:\Users\YourName\AppData\Local\NVIDIA\DXCache and C:\Users\YourName\AppData\LocalLow\NVIDIA\PerDriverVersion\DXCache.
What to do: Set Shader Cache Size to 10 GB or Driver Default if you are tight on SSD space. On 512 GB or smaller drives, Driver Default is safer. Do not set to Unlimited if you have less than 50 GB free. Disable only for troubleshooting.
How to undo: Set back to Driver Default > Apply, and you can safely delete contents of DXCache folders; they will rebuild.
Image Scaling and Antialiasing Overrides
What causes it: Forcing Image Scaling or MSAA/FXAA globally applies a second scaling/AA pass on top of the game’s own TAA or DLSS, causing blur and performance loss.
How to check: If text looks soft even at native resolution, check Image Scaling > Off and Antialiasing – Mode > Application-controlled.
What to do: Set Image Scaling to Off. Set Antialiasing – Mode to Application-controlled, Antialiasing – Setting to None, and Antialiasing – FXAA to Off. Control AA inside each game. For DLSS-capable games, select DLSS Quality or Balanced in-game instead of Control Panel scaling.
How to undo: Toggle Image Scaling Off to On and set a sharpen value 0-100% (if you prefer driver scaling for non-DLSS games). FXAA can be re-enabled per game in Program Settings.
By Hardware Tier
These presets assume you are plugged in, Windows power mode set to Best Performance (Settings > System > Power > Power Mode), and Nvidia GPU selected via MUX switch or Advanced Optimus where available. On battery, all settings should favor Normal power mode and a 60 fps cap.
Low Tier: GTX 1650, RTX 2050, RTX 3050 / 3050 Ti, 4-6 GB VRAM, 1080p 60-144 Hz
Prioritize frame time stability and VRAM conservation. In Global Settings, set Texture Filtering – Quality to High Performance, Power Management Mode to Normal, Low Latency Mode to On, Shader Cache Size to 10 GB. Set Max Frame Rate to 60 fps if thermals are high or your chassis is thin. Keep all Anisotropic Filtering and Antialiasing on Application-controlled so games do not force 8x MSAA that exhausts VRAM. In-game, lower texture quality to Medium, disable ray tracing, and use DLSS Performance or FSR if DLSS is unavailable. If you have a MUX switch in your laptop control app (e.g., Armoury Crate, Legion Vantage, Omen Gaming Hub), enable Discrete GPU or Hybrid Auto for testing; if stuttering appears, fall back to Optimus.
Mid Tier: RTX 3060, RTX 4050, RTX 4060, RTX 4070 Laptop, 6-8 GB VRAM, 1080p/1440p 144-165 Hz
This is the sweet spot for Quality texture filtering with G-SYNC. Set Texture Filtering – Quality to Quality, Trilinear Optimization On, Low Latency Mode On (Ultra only for esports), Power Management Mode Normal globally with Prefer Maximum Performance as a per-game override for stutter-prone titles like Starfield or Hogwarts Legacy. Enable G-SYNC in Display > Set up G-SYNC if your panel supports it, cap to 141 fps on 144 Hz or 162 fps on 165 Hz using the in-game limiter, and leave Vertical Sync Off globally. Use DLSS Quality at 1080p and Balanced at 1440p; avoid driver Image Scaling. If your laptop has Advanced Optimus, set Preferred Graphics Processor to Auto-select so G-SYNC toggles correctly without a reboot. Path to confirm GPU mode: Nvidia Control Panel > Manage Display Mode > Automatic Select or NVIDIA GPU Only.
High Tier: RTX 4070 Ti Laptop and above, RTX 4080/4090 Laptop, 12-16 GB VRAM, 1440p/1600p 165-240 Hz
You can afford higher quality defaults without thermal penalty in well-cooled chassis. Set Texture Filtering – Quality to Quality or High Quality, Power Management Mode to Normal globally (these GPUs boost aggressively even on Normal), Low Latency Mode to On, and Monitor Technology to G-SYNC Compatible. Set Shader Cache Size to 10 GB. Leave Max Frame Rate Off and rely on in-game caps to minimize latency: 237 fps cap for 240 Hz, 162 for 165 Hz. Enable DLSS Quality or DLAA at native res for max sharpness; ray tracing can be set to Medium/High in-game rather than forced in the driver. If you use an external monitor via USB-C DisplayPort or HDMI 2.1, set PhysX configuration > Processor to your Nvidia GPU and configure G-SYNC separately per display under Set up G-SYNC. For creator workloads, leave CUDA – GPUs to All and Threaded Optimization On.
Common Mistakes
Setting Prefer Maximum Performance globally: It raises idle temperatures by 8-15C, keeps fans spinning on the desktop, and offers no fps benefit on Normal in most modern games where boost logic already works correctly. Use it per game only after you have confirmed clock instability.
Forcing Antialiasing or Anisotropic Filtering globally: Forcing 8x or 16x via the Control Panel overrides the game’s modern TAA and can double VRAM bandwidth usage, causing micro-stutter on 6 GB cards. Always leave these on Application-controlled.
Enabling FXAA plus TAA plus Image Scaling at once: Stacking post-process AA blurs the image and adds input lag. Choose one method in-game, typically TAA or DLSS, and disable the driver equivalents.
Capping frame rate in three places: Having Max Frame Rate in Control Panel, fps limit in GeForce Experience, and a limiter in RivaTuner or in-game creates erratic frame pacing. Pick one, preferably the in-game limiter.
Using Vertical Sync On globally with G-SYNC: This adds queue latency on top of G-SYNC and is unnecessary. With G-SYNC active, V-Sync should be Off globally and only enabled as Vertical Sync On in the G-SYNC setup logic (implicitly handled) or forced in-game if you prefer the Nvidia-recommended G-SYNC + V-Sync On + cap combination. Test both and stick with what feels more responsive.
Disabling Shader Cache to save space: On laptops with slower SSDs or limited CPU headroom, disabling the cache reintroduces traversal stutter every launch. Keep it enabled and manage space by limiting to 10 GB.
FAQ
Should I use Nvidia Control Panel or GeForce Experience / Nvidia App to optimize games?
What causes confusion: Both tools can change settings, but the Nvidia App’s one-click optimization often sets conflicting overrides per game.
How to check: Open Nvidia App > Graphics > select a game and see if Optimization is applied. Compare against Manage 3D Settings > Program Settings in Control Panel for the same exe.
What to do: Use Control Panel for baseline global defaults and Program Settings for per-game exceptions. Use the Nvidia App only to update drivers via Drivers > Check for Updates and to enable the overlay (Alt + Z). If you used auto-optimization, click Revert in the Nvidia App and re-apply your Control Panel profile.
How to undo: In Nvidia App, click the three dots on the game tile > Revert. In Control Panel, Program Settings > Remove the custom profile if needed.
Do I need to set Preferred Graphics Processor to High-performance Nvidia processor on a hybrid laptop?
What causes it: Laptops with Optimus use the integrated AMD Radeon or Intel Iris GPU for the desktop to save power and switch to Nvidia for games. Forcing the Nvidia GPU globally hurts battery life.
How to check: Check your laptop manual or control app for MUX Switch or Advanced Optimus. In Device Manager > Display adapters, if you see two adapters (e.g., AMD Radeon Graphics + NVIDIA GeForce RTX 4060 Laptop GPU), you are hybrid.
What to do: Leave Preferred Graphics Processor on Auto-select globally. For a specific game that launches on the wrong GPU (check Task Manager > Performance > GPU 0 vs GPU 1 while the game runs), set Program Settings > OpenGL Rendering GPU or Preferred Graphics Processor to High-performance NVIDIA processor for that exe only.
How to undo: Set Program Settings back to Auto-select or Use global setting. On MUX laptops, switch back to Hybrid Mode in your OEM app and reboot if required.
Why does my game stutter even after applying these settings?
What causes it: Stutter is usually shader compilation, VRAM saturation, thermal throttling, or a conflicting limiter, not a single Control Panel toggle.
How to check: Check thermals with HWInfo64 (CPU/GPU > 95C indicates throttling), VRAM usage in the GeForce overlay (Alt + R > Performance), and frame time graph in-game or via CapFrameX / PresentMon. Check file location C:\Users\YourName\AppData\Local\NVIDIA\DXCache for cache growth.
What to do: Ensure Shader Cache Size is not Disabled, update GPU driver via Nvidia App > Drivers, set Power Management Mode to Prefer Maximum Performance for that game only, lower texture pool in-game if VRAM exceeds your card’s capacity, and remove duplicate frame caps. Elevate the rear of the laptop 1-2 inches for airflow.
How to undo: Revert per-game Power Management Mode to Use global setting, reset Shader Cache Size to Driver Default, and clear extra limiters.
How do I reset everything if settings make games look worse or run slower?
What causes it: Stacked overrides from previous tuning, GeForce Experience optimization, or manual edits in Program Settings persist after global changes.
How to check: In Manage 3D Settings > Global Settings and Program Settings, look for Bold values indicating non-default changes.
What to do: In Nvidia Control Panel > Manage 3D Settings > Global Settings > Restore Defaults > Apply. Then go to Program Settings > select any customized game > Remove > Apply. Finally, re-apply the Quick Recommended Settings table from the top of this guide. Driver files are at C:\ProgramData\NVIDIA Corporation\Drs\nvdrsdb0.bin and nvdrsdb1.bin; restoring defaults rewrites them without manual deletion.
How to undo: You cannot undo a restore without reconfiguring manually, so export profiles beforehand if you experiment: Manage 3D Settings > Profiles > Export (requires Nvidia Profile Inspector if you want granular backup) or simply screenshot your settings.
Related guides
- Best Vrr Settings for Gaming Laptop Display: Best Settings and Config (2026): 8 Tested (2026)
- Best Display Color Settings for Video Editing Laptop: Best Settings and Config (2026): 8 Tested (2026)
- Best Windows Power Settings for Creator Laptop: Best Settings and Config (2026): 8 Tested (2026)
- Best Fan Curve Settings for Thin Gaming Laptop: Best Settings and Config (2026): 8 Tested (2026)


