The best parallel clamps for cabinet making are the Bessey K Body REVO for maximum control, JET Parallel Clamps for a strong all-purpose shop set, and Jorgensen Cabinet Master clamps when value and cabinet-focused sizing matter most.
As an Amazon Associate we earn from qualifying purchases at no extra cost to you.


Our Top Picks


Top 3 picks at a glance
Best parallel clamps for cabinet making at a glance
| Clamp | Best suited to | Common useful lengths | Jaw capacity and pressure | Main advantage |
|---|---|---|---|---|
| Bessey K Body REVO | Frequent cabinet and panel assembly | 12, 24, 31, 40, and 50 in. | Wide parallel jaws; roughly 1,500–1,700 lb class, depending on version | Excellent jaw parallelism and refined pad design |
| JET Parallel Clamp | General-purpose cabinet shops | 24, 31, 40, and 50 in. | Broad jaws and approximately 1,000 lb class | Good balance of stiffness, reach, and handling |
| Jorgensen Cabinet Master | New woodworkers and occasional cabinet work | 24, 31, and 48 in. | Large parallel jaws with moderate-to-high cabinet clamping force | Useful cabinet sizes without premium pricing |
| Bora Parallel Clamp | Budget-conscious panel assembly | 24, 31, 40, and 50 in. | Wide jaws and substantial clamping force for the price | Accessible entry point for a matched set |
Clamping-force figures are not perfectly comparable: manufacturers may measure force at different handle positions, and a clamp’s real usefulness depends just as much on bar stiffness, jaw alignment, and how well it resists slipping.
What matters more than the advertised pressure
Jaw capacity and throat depth
Jaw capacity is the maximum distance between the fixed and sliding jaws. For cabinet work, the required capacity is usually the assembly width plus enough room to position the clamp comfortably. A 24-inch clamp is useful for many drawer boxes, small carcasses, and face frames, while a 31-inch clamp is a versatile size for upper cabinets and medium panels.
Throat depth is different. It is the distance from the bar to the clamping face, and it determines how far the clamp can reach across a panel. Most parallel cabinet clamps provide a deeper throat than ordinary pipe or F-style clamps. That helps distribute force over a cabinet side rather than concentrating it close to the edge.
Clamping pressure without panel damage
High pressure is valuable when closing stubborn joints, but excessive pressure can bow a cabinet side, crush softwood, or squeeze too much glue from a joint. A useful parallel clamp should deliver enough force through a broad jaw while remaining controllable at the handle.
For typical plywood or hardwood cabinet joinery, use firm hand pressure and check the joint rather than automatically tightening until the handle stops. If the panel begins to cup between clamps, the problem is usually clamp placement or insufficient cauls, not a lack of pressure.
Bar stiffness
A stiff bar keeps the jaws aligned when pressure increases. A flexible bar can pull the ends of a panel together while leaving the center joint open. This is particularly noticeable when edge-gluing wide panels or assembling long base cabinets.
Look for a thick, rigid steel bar and a sliding jaw that does not visibly tilt under load. A heavier bar usually performs better, but it also makes the clamp tiring to position. For a home shop, a useful set often combines several medium-length clamps with only a few extra-long models rather than buying every clamp in the heaviest construction.
Pad design and workpiece protection
Parallel clamp jaws should have broad, replaceable faces that remain square to the workpiece. Some designs include plastic pads or removable covers to reduce marring. These pads are especially helpful on prefinished plywood and light-colored hardwoods.
Do not rely on clamp pads alone when the surface is delicate. Put waxed paper between the assembly and any squeeze-out, and use flat cauls when pressure needs to be spread over a large area. A caul also helps correct minor alignment differences between boards.
Rack resistance
Racking occurs when the clamp body twists or the jaws become skewed instead of pushing squarely. It is common when clamping a rectangular cabinet from only one side. A well-designed parallel clamp resists this through a broad jaw, a stable sliding mechanism, and a bar that does not twist under load.
Even the best clamp cannot eliminate poor assembly technique. Alternate clamps above and below a panel, measure the diagonals, and use a pair of clamps on long assemblies when one clamp would pull the joint out of square.
Head-to-head: which model fits your shop?
Bessey K Body REVO: best for precision and repeated use
The Bessey K Body REVO is the strongest recommendation for a cabinetmaker who assembles panels regularly and wants predictable jaw alignment. Its wide parallel jaws, substantial bar, and high-pressure design make it suitable for face frames, carcasses, wide edge-glued panels, and long glue-ups.
The tradeoff is weight and price. A full set becomes expensive and can be awkward to move around a large cabinet. Choose 24- and 31-inch versions first, then add 40- or 50-inch clamps as your projects require them. Twelve-inch models are useful for drawer boxes and small frames, but they should supplement rather than replace medium-length clamps.
JET Parallel Clamp: best all-rounder
JET’s parallel clamps occupy a practical middle ground. They provide broad jaws, useful bar rigidity, and enough force for most cabinet glue-ups without feeling as specialized as the heaviest premium clamps. They are a sensible choice when the shop needs several matched clamps for face frames and carcasses.
Choose JET when you want a coherent set with similar handling across multiple lengths. The 24- and 31-inch sizes cover much of ordinary cabinet construction; 40- and 50-inch versions are better reserved for full-width panels and tall cabinet sides.
Jorgensen Cabinet Master: best value for occasional cabinet work
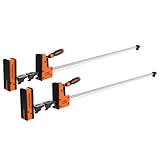
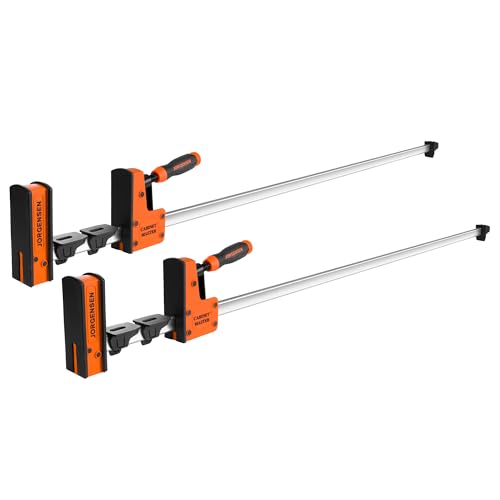
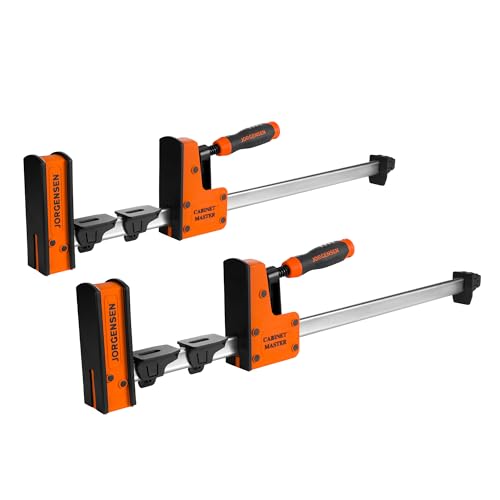
The Jorgensen Cabinet Master range is aimed directly at cabinet assembly, with broad parallel jaws and sizes that correspond well to common casework. It is a strong option for a new shop that needs several clamps but does not yet want to invest in a premium set.
Its moderate weight can be an advantage when positioning clamps around a cabinet alone. For demanding wide-panel glue-ups, add more clamps or use cauls rather than expecting one clamp to correct a badly misaligned assembly.
Bora Parallel Clamp: best budget starting point
Bora’s parallel clamps are worth considering when the priority is obtaining multiple long clamps at a lower general market cost. They are useful for cabinet sides, shelves, and panel glue-ups, provided the clamps are kept square and the work is supported properly.
Budget clamps can show more variation in sliding action or bar stiffness than premium alternatives. Before gluing, operate each clamp through its full range, confirm that both jaws sit parallel, and reserve any clamp with noticeable movement for lighter-duty work.
Choose clamp lengths by the assembly, not the maximum project size
| Job | Recommended clamp length | Practical quantity | Reason |
|---|---|---|---|
| Drawer boxes and small frames | 12–18 in. | 4 or more | Shorter clamps are lighter and easier to place at each corner |
| Face frames | 24–31 in. | 4–6 | Enough reach for rails, stiles, and diagonal correction |
| Upper cabinet carcasses | 31–40 in. | 4–6 | Covers common cabinet depths and diagonal spans |
| Base cabinet carcasses | 40–50 in. | 2–4 | Provides extra reach for wide or tall assemblies |
| Wide edge-glued panels | Length at least 6 in. greater than panel width | Every 8–12 in. along the panel | Reduces gaps between clamps and limits bowing |
For example, a 30-inch-wide panel should not be clamped with a 30-inch model at its absolute limit. A 36- or 40-inch clamp gives room to position the jaws, add cauls, and keep the handle clear of the workbench. For a 48-inch panel, use 54-inch capacity if available, or arrange shorter clamps with a panel-joining setup that does not force them beyond their comfortable range.
A practical buying plan
- Small cabinet shop: start with four 24-inch and four 31-inch clamps. This covers most face frames, drawer boxes, and upper cabinet assemblies.
- Furniture and panel work: add two to four 40-inch clamps, then buy 50-inch models only for panels or carcasses that genuinely need them.
- Mostly face frames: prioritize quantity and low handling weight over extreme pressure. Six medium clamps are usually more useful than two oversized clamps.
- Premium setup: select Bessey K Body REVO in the lengths used most often, and mix in less expensive long clamps for occasional large assemblies.
- Value setup: compare Jorgensen Cabinet Master and Bora Parallel Clamp sizes, then spend the savings on extra clamps and flat cauls.
How to use parallel clamps without bowing a cabinet
- Dry-fit the cabinet and check both diagonals before applying glue.
- Place clamps near the joints, but leave enough space to see whether the joint closes evenly.
- Alternate clamp positions above and below the assembly to balance the load.
- Tighten each clamp gradually, moving from one end to the other instead of fully tightening the first clamp.
- Use a straightedge across the panel and adjust pressure if the center bows.
- Clean squeeze-out after the joint is stable, then recheck the diagonals before the glue cures.
The best parallel clamps for cabinet making are therefore not simply the models with the highest pressure rating. Bessey K Body REVO is the premium precision choice, JET is a balanced all-purpose option, and Jorgensen Cabinet Master or Bora provide sensible routes into a complete cabinet-clamp set. For most shops, four to six clamps in the 24- to 31-inch range, supported by a few 40- or 50-inch clamps, will produce a more useful setup than a small collection of extremely long models.
Frequently asked questions
How many parallel clamps do I need to start cabinet making?
Start with four 24-inch and four 31-inch clamps for a small cabinet shop. That combination covers most face frames, drawer boxes, and upper cabinet assemblies. If you mostly build face frames, prioritize quantity and lower handling weight over extreme pressure. Six medium clamps can be more useful than two oversized clamps because they allow more even pressure distribution.
Are 24-inch clamps enough for most cabinet projects?
Twenty-four-inch clamps are useful for many drawer boxes, small carcasses, and face frames, but they are not enough for every cabinet project. Thirty-one-inch clamps are more versatile for upper cabinets and medium panels, while 40- or 50-inch models suit larger assemblies. Choose lengths according to the assembly rather than the maximum project size you might eventually build.
Should I buy all my parallel clamps from one brand?
You do not need to buy every clamp from one brand. A premium setup can use Bessey K Body REVO clamps in frequently used lengths and less expensive long clamps for occasional large assemblies. The article also recommends comparing Jorgensen Cabinet Master and Bora Parallel Clamp sizes, then using the savings for extra clamps and flat cauls.
What should I check before using a budget parallel clamp?
Before gluing, operate the clamp through its full range and confirm that both jaws sit parallel. Budget clamps can show more variation in sliding action or bar stiffness than premium alternatives. Reserve any clamp with noticeable movement for lighter-duty work, and keep the clamps square while supporting the work properly during cabinet sides, shelves, and panel glue-ups.
Can parallel clamps replace cauls during cabinet assembly?
No, parallel clamps should not replace cauls when pressure must be spread over a large area. A caul helps distribute pressure and correct minor alignment differences between boards. Use waxed paper between the assembly and squeeze-out, and add flat cauls when needed. If a panel cups between clamps, adjust clamp placement or use cauls rather than simply applying more pressure.