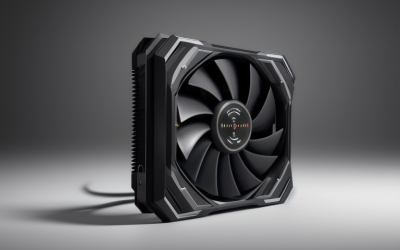
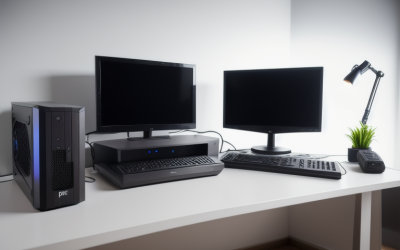
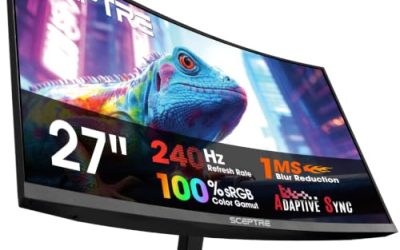
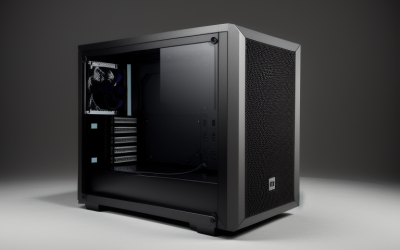
To set up a new prebuilt gaming PC, connect your monitor to the graphics card (not the motherboard), plug in power, finish the Windows first-run setup, run Windows Update, install the latest graphics driver from the GPU maker, switch your monitor to its full refresh rate and enable the memory profile if it is not already on. Then remove preinstalled software you do not want and back up the recovery tools before installing games.
As an Amazon Associate we earn from qualifying purchases at no extra cost to you.


Our Top Picks


Top 3 picks at a glance
Short Answer: The Setup Order
| Step | Task | Why it matters |
|---|---|---|
| 1 | Unbox, inspect and place the PC with airflow space | Catches shipping damage; keeps temperatures down |
| 2 | Connect monitor to the graphics card ports | The motherboard video ports usually do nothing when a discrete card is installed |
| 3 | Connect keyboard, mouse, network, power | Wired Ethernet is the most stable for large downloads |
| 4 | Windows first-run setup | Account, region, privacy choices |
| 5 | Windows Update | Security fixes and drivers |
| 6 | Graphics and chipset drivers | Better game performance and stability |
| 7 | Set refresh rate, enable memory profile, set power plan | Prebuilt PCs sometimes leave high-refresh monitors at default |
| 8 | Remove bloatware, install launchers and games | Cleaner system and less background load |
Step 1: Unbox and Inspect
Take the PC out carefully and look for dents, loose parts or a rattle when you tilt it gently. Prebuilt makers often include foam or brackets that hold the graphics card or the CPU cooler in place during shipping, and the maker’s instructions say whether to remove them before powering on. Read the quick-start card or the maker’s support page for your model. Take photos if anything is damaged and contact the seller or maker before using the system.
Place the PC where the front intake and rear exhaust have room, and avoid pushing it against walls or into closed cabinets. Keep it off thick carpet if the case has bottom intakes.
Step 2: Connect the Cables Correctly
- Monitor to the graphics card. The graphics card sits in the horizontal slot with its own set of DisplayPort and HDMI outputs, usually lower on the rear panel. The motherboard’s ports sit higher up beside the USB ports. If you plug into the motherboard, you may get no signal or, on some systems, the display may run on the integrated graphics instead of the powerful card.
- Cable type. DisplayPort is common for high refresh rate monitors. If using HDMI, the cable and port version must support the refresh rate and resolution; the monitor and card makers list supported versions. An older cable can silently cap refresh rate.
- Power. Use the supplied power cable in a wall outlet or a quality surge protector. Make sure the power supply’s rear switch is on.
- Network. Ethernet is preferred for updates and game downloads. If using Wi-Fi, use the antenna if the board provides one.
Step 3: Windows First-Run Setup
On first boot, Windows asks for your region, keyboard layout, network and account. Current Windows 11 setup steers many users toward signing in with a Microsoft account, and the privacy screens let you choose diagnostics and advertising options. Pick the settings you are comfortable with, and read each page before accepting. Prebuilt makers may add their own welcome or registration app; registering can help with warranty claims but is optional unless the maker states otherwise.
Step 4: Update Windows, Then Drivers
- Run Windows Update and restart as needed. Repeat until no further updates show, because some installs only appear after earlier ones finish.
- Download the latest graphics driver from the GPU maker (NVIDIA, AMD or Intel). Prebuilt systems often ship with an older driver. Choose the standard installer and follow its prompts.
- Check the prebuilt maker’s support page for chipset, audio, network and BIOS updates specific to your model. Some prebuilt makers use custom boards or firmware, so use their download page for your model number rather than generic downloads for the board.
- Apply BIOS updates only if the maker recommends them for a problem you have. Follow the instructions exactly and never interrupt the update.
Step 5: Check the Basics in Windows and BIOS
| Setting | Where to look | What to confirm |
|---|---|---|
| Monitor refresh rate | Windows display settings, advanced display | Set to the monitor’s highest listed rate |
| Adaptive sync (G-Sync or FreeSync) | GPU control panel and monitor menu | Enable if your monitor supports it, following the maker’s guidance |
| Memory speed | Task Manager performance tab or a hardware info tool | Compare with the speed printed on the memory spec; if lower, enable XMP or EXPO in BIOS |
| Dual-channel memory | Hardware info tool | Two sticks in the board’s recommended slots |
| Power plan | Windows power settings | Balanced or high performance as you prefer |
| Game Mode | Windows gaming settings | On by default in recent Windows versions; leave on unless a game has issues |
| Resizable BAR | BIOS and GPU control panel | Supported on many recent platforms; follow board and GPU maker guidance |
Many prebuilt systems ship with the memory running at a default speed rather than its rated speed, which is why enabling the memory profile is a common first tweak. BIOS changes carry some risk of instability and may affect warranty terms if you go on to overclock, so enable only the memory profile at first, and check the maker’s warranty page. Menu names differ by maker, so use the motherboard or system manual for the path.
Step 6: Clean Up Preinstalled Software
Prebuilts often include trial antivirus, maker utilities and promotional apps. Open Installed apps in Windows settings and remove trials you do not plan to use. Keep drivers, the maker’s support or warranty tools and any fan or lighting software you want. If you keep a third-party antivirus trial, remember it can slow the system and prompt for subscription; Windows includes its own security tool that is enabled when no other product is active.
Also trim startup items in Task Manager so lighting utilities and launchers do not all open at login.
Step 7: Protect the System
- Create a recovery drive or note the maker’s recovery method. Many prebuilt makers include a recovery partition or a download tool.
- Turn on a backup method for saves, such as cloud saves in your launcher or an external drive.
- Save the warranty paperwork, serial number and model name.
- Keep the box if the return window is open, in case something is faulty.
Step 8: Install Games and Test Stability
Install launchers and download games on a drive with free space; the system drive can fill quickly. Run a demanding game or a benchmark tool and watch temperatures and clock speeds in a monitoring utility. Normal behaviour is warm components and fans ramping under load. Instability, crashes, very high temperatures, or fan noise that does not settle suggests a configuration or hardware issue to raise with the maker’s support under warranty.
Common Mistakes
| Mistake | What happens | Fix |
|---|---|---|
| Monitor plugged into the motherboard | No signal or poor performance | Move the cable to the graphics card |
| Staying at 60 Hz | Game feels less smooth than the monitor allows | Select the highest refresh rate in display settings |
| Skipping the graphics driver | Lower performance, missing features | Install the latest from the GPU maker |
| Single stick of memory or memory in the wrong slots | Lower memory bandwidth | Follow the manual’s slot layout |
| Removing every maker app | Lose warranty or support tools | Keep the support app and drivers |
| Opening the power supply or forcing parts | Injury or voided warranty | Leave it to the maker’s support |
Frequently Asked Questions
Why is there no signal on my new prebuilt gaming PC?
The most common cause is the monitor cable plugged into the motherboard instead of the graphics card. Move it to a port on the graphics card. If there is still no signal, check the cable type, the monitor’s input selection and that the graphics card power cables are seated, then contact the maker.
Should I reinstall Windows on a new prebuilt?
Not usually. A clean install removes preinstalled clutter but also the maker’s drivers and recovery setup. Removing unwanted apps and updating drivers is a simpler first step.
Do I need to update the BIOS right away?
Not unless the maker lists a fix for a problem you have. BIOS updates carry risk, so follow the maker’s guidance and make sure power stays on during the update.
How do I know if my RAM is running at its rated speed?
Compare the speed shown in a hardware info tool or Task Manager with the rating on the memory’s label or spec sheet. If it is lower, the memory profile is probably off and can be enabled in BIOS.
Is it normal for a new PC to be loud on first boot?
Fans often spin briskly while Windows installs updates and drivers, then settle. If noise stays loud at idle or you hear grinding, contact the maker, since a fan or part may be faulty.
How long should I wait before installing games?
Finish Windows Update and the graphics driver first, because installing games before updates can cause driver conflicts or repeated restarts during downloads.
Related guides
More from Amazon
Programs that pair well with the guide above. Offers and eligibility are set by Amazon and may change.
Free shipping on eligible items, Prime Video and more. Eligible new members can start with a free trial.
Start a Prime free trialAd-free music streaming. Eligible new subscribers can start with a free trial.
Try Music Unlimited freeA Prime membership for ages 18-24 with a trial period. Eligibility is set by Amazon.
See Prime for Young AdultsAudiobooks and podcasts to listen to on the go. Eligible new members can start with a free trial.
Try Audible freeAs an Amazon Associate we earn from qualifying purchases.