A high average FPS does not always mean smooth gameplay. gaming laptop frame pacing explained starts with understanding how consistently your laptop delivers frames to the display. This guide covers frame times, 1% lows, common causes of stutter, and practical ways to measure and improve visual consistency without unnecessary upgrades.
What Gaming Laptop Frame Pacing Really Comes Down To
Frame pacing describes how consistently a game produces and presents successive frames. Average FPS measures overall rendering speed, while frame-time variation reveals whether frames arrive at regular intervals. Understanding both helps you distinguish a genuinely smooth experience from one interrupted by occasional freezes, uneven motion, or sudden dips.
Frame rate versus frame time
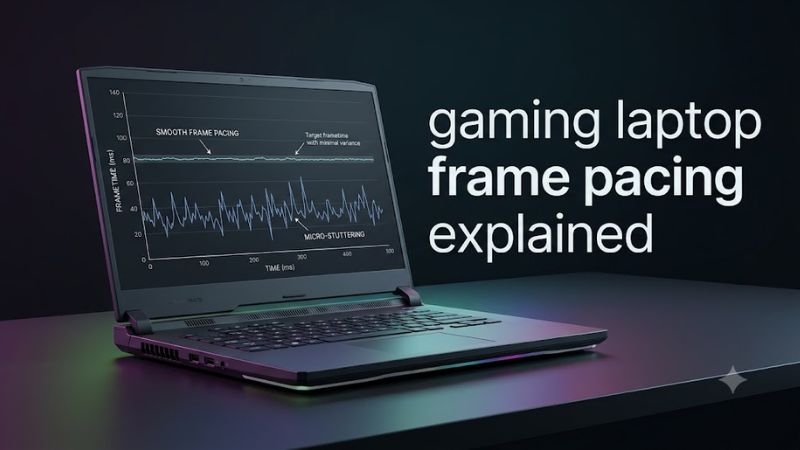
FPS, or frames per second, tells you how many frames a game produces over a period. Frame time measures the interval associated with each frame in milliseconds. At a perfectly consistent 60 FPS, successive frames would take approximately 16.67 milliseconds each; at 120 FPS, that interval would be approximately 8.33 milliseconds.
Real games rarely maintain perfectly identical intervals. A complicated scene, background task, or sudden increase in CPU workload can delay an individual frame. If that delay is noticeable, motion may briefly appear to pause even when the FPS counter usually reports a high number. Intel’s CPU benchmarking guide explains why frame-time consistency matters alongside average performance.
Why consistent delivery feels smoother
Imagine two gaming laptops averaging 90 FPS. One delivers frames at relatively regular intervals, while the other alternates between quick frames and occasional long delays. The second laptop can feel less responsive and produce visible judder despite sharing the same average.
This is the central idea behind gaming laptop frame pacing explained in practical terms: consistency matters in addition to speed. The comparison does not mean every small timing variation is visible. What matters is the size, frequency, and context of deviations, particularly during fast camera movement or competitive play.
What 1% lows and 0.1% lows tell you
The 1% low FPS metric summarizes performance among the slowest one percent of measured frames, using a calculation method that converts frame-time data into an FPS figure. It helps reveal recurring slow frames that an average can conceal. A result closer to average FPS generally indicates more consistent delivery, although the precise calculation can vary by tool.
The 0.1% low focuses on the slowest fraction of frames and can highlight more severe interruptions. However, it is sensitive to short capture periods and isolated events. Use these metrics alongside a frame-time graph and repeatable gameplay observations rather than treating one unusually low number as proof of a hardware fault. See RTINGS’ laptop game-benchmark methodology for additional context.
What doesn’t help
Chasing the highest possible FPS is not automatically the right response to uneven motion. Lowering every graphics setting, buying more RAM without checking usage, or installing a performance utility may leave the underlying cause untouched. Frame pacing can be affected by the game engine, CPU scheduling, GPU load, storage activity, drivers, and shader compilation.
Nor should you assume that every visible hitch comes from overheating or insufficient GPU power. A repeatable slowdown when entering a new area may have a different cause from a sustained drop during a demanding battle. Identify when the problem occurs before changing settings or purchasing hardware.
How to Read Frame Pacing and Identify Common Problems
The most useful way to assess frame pacing is to combine average FPS, low-percentile FPS, frame-time behavior, and what you see during gameplay. No single metric identifies every cause. The table below maps common symptoms to likely explanations and practical checks, helping you narrow the issue without changing several settings at once.
Read a frame-time graph
A frame-time graph shows how long individual frames take to render or reach the relevant measurement point. A relatively steady line suggests consistent delivery, while tall spikes indicate frames that took longer than neighboring frames. The exact interpretation depends on the capture tool and whether it measures rendered, displayed, or presented frames.
Look for patterns rather than isolated peaks. Repeated spikes during combat may indicate a recurring CPU or GPU workload, while interruptions when entering a new area may involve asset streaming or shader compilation. A spike during a loading screen or scene transition may be expected and does not necessarily indicate a problem during ordinary gameplay.
Compare average FPS with 1% lows
The gap between average FPS and 1% lows can help you judge consistency, but there is no universal cutoff that proves a laptop has poor frame pacing. A large difference warrants investigation, particularly when you can reproduce the stutter. Compare results from the same game, settings, capture method, and duration.
For example, a laptop averaging 100 FPS with noticeably lower 1% lows may feel less consistent than its average suggests. That does not automatically make another laptop with a lower average superior. Different games and testing methods can produce different results, so comparisons are most useful when the conditions match.
Diagnose symptoms before changing settings
| Observed symptom | Possible explanation | Useful check |
| High average FPS with occasional hitches | Shader compilation, asset streaming, background activity | Repeat the same route and observe whether spikes recur |
| FPS drops during demanding scenes | CPU or GPU workload limits | Compare performance at lower resolution and graphics settings |
| Stutter when loading new areas | Storage access or asset streaming | Check whether the pause coincides with disk activity |
| Uneven motion at relatively stable FPS | Frame-time variation or display synchronization | Inspect frame-time data and display refresh settings |
| Smooth-looking output but delayed controls | Input latency or frame-generation effects | Compare base game FPS, latency metrics, and generated FPS where available |
| Performance deteriorates during longer sessions | Possible thermal or power limitation | Monitor CPU/GPU clocks, temperatures, and power behavior |
These are diagnostic clues, not definitive diagnoses. Steam’s in-game performance monitor documentation explains how FPS, CPU/GPU load, memory usage, and frame generation information can help separate different performance problems.
Understand frame generation and display synchronization
Frame generation creates additional displayed frames from information supplied by the game and rendering pipeline. It can make motion look smoother, but the displayed FPS number may include generated frames that do not represent the game’s underlying simulation and rendering rate. Consequently, a high displayed FPS does not necessarily mean equally responsive controls.
Display synchronization also matters. V-Sync can reduce tearing, but its behavior and latency trade-offs depend on the game and display. Variable refresh rate (VRR), where supported, allows a compatible display to adjust its refresh behavior to changing frame delivery. Check the laptop panel’s capabilities before assuming that a particular synchronization feature is available. NVIDIA’s FrameView guide provides further context for interpreting performance and smoothness metrics.
How to Improve Gaming Laptop Frame Pacing
Start with a repeatable baseline, then change one variable at a time. This approach makes it easier to identify whether a setting actually helps. You do not need to buy a new GPU, replace system memory, or modify Windows internals just to begin investigating inconsistent frames.
Step 1: Measure the same gameplay sequence
Choose a repeatable section of a game, such as a built-in benchmark or the same route through a familiar level. Keep resolution, graphics settings, power mode, and background applications consistent. Record average FPS, 1% lows if available, and frame-time spikes during the same duration.
Steam’s performance monitor is one option: open Steam’s Settings → In Game and look for the Performance Monitor controls. Available metrics depend on the current client and system. Alternatively, use a compatible frame-time capture utility. Avoid comparing results from different tools without checking how each calculates and records frames.
Step 2: Set a sensible FPS target
An unrestricted frame rate can fluctuate significantly when a laptop alternates between light and demanding scenes. Try the game’s built-in frame-rate limiter first, then compare the result with the original configuration. A reasonable cap may reduce workload variation and power consumption when the GPU otherwise has substantial unused capacity.
Choose a target that your laptop can sustain in demanding gameplay, rather than basing it solely on the highest FPS seen in an empty area. If the cap is too low, responsiveness may suffer; if it is too high, the system may continue experiencing large fluctuations. Restore the original setting if the comparison makes gameplay worse.
Step 3: Check the display and synchronization settings
In Windows, open Settings → System → Display → Advanced display to inspect the selected display’s refresh rate and available VRR information. Select a supported refresh rate appropriate for gaming. The available choices depend on the laptop panel, resolution, and connected display.
Next, inspect the game’s V-Sync and VRR-related options, along with any relevant GPU control-panel settings. Test one synchronization configuration at a time. V-Sync, VRR, and frame caps affect tearing, latency, and presentation differently; no single combination is ideal for every display or game. Microsoft documents these display controls in its refresh-rate guide.
Step 4: Investigate recurring spikes
If the same stutter persists, check whether it correlates with shader compilation, new-area loading, CPU saturation, GPU saturation, memory pressure, or unusual background activity. Allow a game to finish initial shader preparation when appropriate, and check official game updates or graphics-driver release notes if the problem began after an update.
For suspected thermal or power limitations, compare CPU/GPU clocks and temperatures during the slowdown instead of relying on a single temperature reading. If performance worsens over time, ensure vents are unobstructed and use the manufacturer’s recommended gaming power profile while connected to the appropriate adapter. Change only the setting linked to the observed symptom, and reverse changes that do not improve repeatable results.
FAQ
Is frame pacing more important than average FPS?
Neither metric tells the whole story. Average FPS describes overall performance, while frame pacing describes consistency. For a smooth experience, consider both metrics alongside visible stutter and responsiveness.
What is a good 1% low FPS for a gaming laptop?
A useful 1% low depends on the game, average FPS, settings, and display. A value closer to average FPS generally indicates more consistent performance, but comparisons require matching test conditions.
Can frame generation fix poor frame pacing?
Frame generation can improve perceived motion smoothness in supported games, but it cannot correct every underlying rendering delay. Low base FPS, inconsistent frame delivery, or added input latency may remain relevant.
Does better frame pacing require a more powerful GPU?
Not necessarily. Stutters can come from shader compilation, CPU limitations, storage activity, background tasks, or display synchronization. Diagnose the recurring symptom before considering a hardware upgrade.
Final Thoughts
Understanding gaming laptop frame pacing explained in terms of frame times, 1% lows, and display behavior makes performance problems easier to investigate. Start by measuring a repeatable gameplay sequence, then adjust one setting and compare the results. If the same spikes persist, use their timing and system metrics to identify the next diagnostic step.