Gaming laptops often balance performance, fan noise, temperature, and battery life through several separate controls. Learning how to create a gaming performance profile on a laptop helps you configure Windows, graphics preferences, and manufacturer utilities for gaming while keeping everyday use quieter and more efficient.
What a Gaming Performance Profile Really Comes Down To
A gaming performance profile is a repeatable set of power, cooling, and graphics preferences for playing games. You can create one using Windows settings and your laptop manufacturer’s control software, even if your model does not support custom profiles. The goal is consistent behavior, not automatically forcing every component to maximum power.
Understand the settings that control performance
Windows power mode affects the balance between energy use and responsiveness. Your laptop’s manufacturer utility may also control CPU and GPU power limits, fan behavior, and predefined operating modes. These controls serve different purposes, so selecting a Windows performance mode does not necessarily activate your laptop’s highest-performance cooling profile.
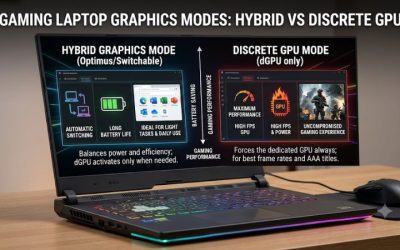
The graphics preference for an individual game is another separate setting. A laptop with integrated and dedicated graphics may let you choose which GPU an application prefers, although some systems manage this automatically. Your actual options depend on the hardware, graphics drivers, Windows version, and manufacturer software installed.
Decide when the profile should be active
Start with a plugged-in gaming profile for demanding games. Many gaming laptops limit their highest-performance modes when running on battery, and some manufacturer-specific modes are available only while connected to the appropriate power adapter. Use the charger intended for your laptop whenever you want its normal plugged-in performance.
A separate everyday profile should prioritize lower noise and reasonable battery consumption. This avoids running high fan speeds or performance-focused power settings during browsing, video playback, or document work. If your laptop offers only predefined modes, switching between those modes is sufficient; creating a custom fan curve is not essential.
Choose safe, practical settings
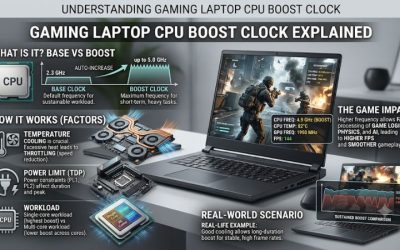
Begin with the laptop manufacturer’s standard Performance mode rather than manually increasing CPU or GPU clock speeds. A factory-defined mode provides a useful starting point because the manufacturer has configured its intended power and cooling behavior. More aggressive settings can increase heat, fan noise, and power consumption without producing a proportional improvement in game performance.
Keep the laptop’s existing default settings for overclocking and voltage unless you understand the risks and have a specific reason to change them. A useful profile should be stable, easy to activate, and reversible. Record the original settings before changing anything beyond the normal operating-mode presets.
What Doesn’t Help
Installing multiple utilities that control the same power or fan functions can create confusion over which settings are active. Avoid registry tweaks, generic RAM-cleaning tools, and scripts that claim to boost FPS by disabling Windows services. These are not reliable substitutes for selecting the correct GPU, power mode, or cooling profile.
Do not assume that the highest fan setting or power mode will always deliver the best gaming experience. Performance depends on the laptop’s cooling capacity, CPU and GPU limits, game workload, and power supply. Start with supported presets and make additional changes only when you can identify a specific problem worth addressing.
How to Create a Gaming Performance Profile: Step by Step
To build a useful gaming profile, configure Windows power mode, select the appropriate graphics preference, choose a supported laptop performance mode, and verify the results in a real game. The exact controls vary by manufacturer, so treat the following settings as a practical baseline rather than a universal preset.
Step 1: Set Windows to a gaming power mode
In Windows 11, open Settings > System > Power & battery. Under Power mode, select Best performance when gaming while plugged in. If your laptop offers different power modes for plugged-in and battery operation, choose settings appropriate to each situation. If the option is unavailable, check the active power plan in Control Panel > System and Security > Power Options.
Best performance can increase power consumption and operating temperatures. It does not override every firmware or manufacturer-imposed limit, and it cannot compensate for inadequate cooling. To reverse the change, return to the same menu and select Balanced or another available mode.
Step 2: Choose the preferred GPU for your game
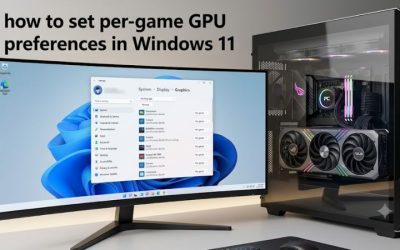
On a Windows 11 laptop with both integrated and dedicated graphics, open Settings > System > Display > Graphics. Select an installed game from the application list, or add its executable if necessary. Choose Options, select High performance when appropriate, and click Save. Restart the game if needed.
This preference asks Windows to favor the high-performance GPU; the actual behavior depends on the laptop’s graphics configuration and drivers. It does not increase the GPU’s power limit or guarantee higher frame rates. If the option is unavailable or the game uses a different graphics path, leave the default selection and consult the manufacturer’s graphics settings.
Step 3: Select the laptop’s performance and cooling mode
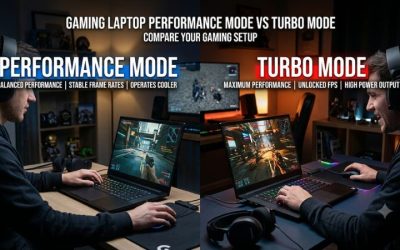
Open your manufacturer’s control utility and look for a section labeled Performance, Thermal, Power, Fan, or Operating Mode. Choose the standard Performance preset first. Depending on the laptop, the available choices may include Silent, Balanced, Performance, Turbo, or a custom mode. Not every model supports all these options.
For example, ASUS Armoury Crate offers operating modes that adjust CPU and GPU behavior, cooling, and noise according to the model. Its Turbo mode is restricted to plugged-in operation on supported systems. Other manufacturers use different utilities and names. Avoid manual overclocking or custom voltage changes when your goal is simply to create a dependable gaming profile.
Step 4: Save, verify, and refine the profile
If your utility supports named profiles or game-specific scenarios, create a profile called Gaming and save the supported settings. Otherwise, document the combination of Windows power mode, manufacturer operating mode, and GPU preference so you can reproduce it. Do not assume that a saved application profile automatically changes every Windows setting.
Launch a familiar game and play a repeatable section under normal conditions. Check frame-rate consistency, stuttering, fan noise, temperatures, and whether the laptop remains connected to its intended charger. If the system becomes excessively noisy or performance deteriorates during longer sessions, return to the standard Performance preset and investigate cooling or power limitations before changing more settings.
Gaming profile settings comparison
| Setting or Step | Where | Effect | Risk |
| Windows power mode | Settings > System > Power & battery | Prioritizes performance or balances power use | Higher power consumption and heat |
| Per-game GPU preference | Settings > System > Display > Graphics | Favors the dedicated GPU on supported systems | Higher energy use; limited effect on some configurations |
| Laptop performance mode | Manufacturer control utility | Adjusts supported power and cooling behavior | More fan noise and heat in aggressive modes |
| Profile verification | Run a familiar game under repeatable conditions | Helps identify stuttering, instability, or unwanted noise | Results can vary with game updates and background activity |
Keep Your Gaming Profile Consistent
A profile is useful only if it behaves predictably across gaming sessions. Check that the laptop is using the intended mode, the game is assigned the appropriate GPU where supported, and cooling remains adequate. Recheck the configuration after major driver, Windows, or manufacturer-utility updates if performance changes unexpectedly.
Use Game Mode where appropriate
Windows includes Game Mode under Settings > Gaming > Game Mode. Check that it is enabled if you want Windows to apply its gaming-focused behavior. Game Mode is separate from the power and cooling profile, so enabling it does not replace the other steps.
Keep expectations realistic: no single Windows toggle guarantees an FPS increase. The result depends on the game, hardware, competing background tasks, and existing configuration. If performance is already consistent, avoid changing additional system settings without a specific reason.
Match cooling to the workload
A standard Performance preset is a reasonable starting point for longer gaming sessions. A quieter mode may be preferable for less demanding games, while a supported Turbo mode may increase fan noise and power consumption. Keep the laptop on a hard, stable surface with unobstructed air intakes and exhaust vents.
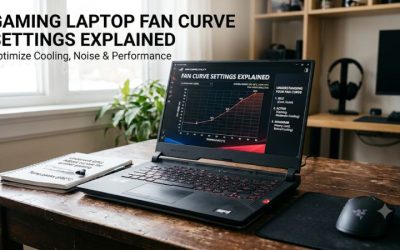
If temperatures rise and frame rates fall during extended play, do not immediately assume that the profile is wrong. Dust buildup, ambient temperature, cooling design, and CPU or GPU power limits can all affect sustained performance. Return to the manufacturer’s standard settings before attempting advanced fan curves or other manual adjustments.
Keep separate settings for battery use
A gaming profile designed for plugged-in use is not necessarily suitable for travel. When running on battery, switch to Balanced or an available efficiency-focused mode and reduce display brightness if appropriate. Some laptops automatically change GPU, fan, or power behavior when disconnected from the charger.
Do not expect a dedicated GPU to sustain its full plugged-in gaming performance on battery. If you regularly switch between work and gaming, use the manufacturer’s predefined profiles where available and check which mode is active after reconnecting the charger. This is more reliable than assuming that one configuration suits every situation.
Troubleshoot changes that do not take effect
If your gaming performance profile appears ineffective, check the active Windows power mode, the manufacturer’s operating mode, and the game’s graphics preference separately. Some laptop utilities manage power settings that differ from Windows defaults, while certain high-performance options may be restricted by the model or power source.
If performance changes after an update, compare the current configuration with your previous settings before reinstalling drivers or modifying firmware. Restore the standard manufacturer preset if a custom setting causes instability. Only pursue deeper troubleshooting when repeatable observations point to a specific driver, cooling, or power issue.
FAQ
1. Can I create a gaming performance profile on any laptop?
You can configure a basic gaming setup on most Windows laptops, but custom fan curves and named profiles depend on the manufacturer and model. Windows power and graphics settings provide a useful starting point even when the laptop has no dedicated profile utility.
2. Does a gaming performance profile increase FPS?
A gaming performance profile can help a laptop use its available performance more consistently, but it does not guarantee higher FPS. The effect depends on the game, power limits, cooling, graphics configuration, and whether the previous settings were restricting performance.
3. Should I use Best performance while gaming on battery?
Usually, prioritize an efficiency-focused or balanced mode when gaming on battery. Best performance can drain the battery faster, and many gaming laptops restrict high-power operating modes when unplugged. Use the intended charger for demanding gaming sessions.
4. Is it safe to use Turbo mode or a custom fan curve?
A manufacturer-supported Turbo preset is generally the safer starting point than manual overclocking, but it can increase noise, heat, and power consumption. Custom fan curves and clock adjustments require more care. Restore the standard preset if you encounter instability or unexpected behavior.
Final Thoughts
Learning how to create a gaming performance profile on a laptop starts with a few reversible settings, not risky system tweaks. Configure Windows power mode, select the appropriate GPU preference, and use your manufacturer’s supported Performance preset. Test a familiar game, then adjust only what your results show needs improvement.