Choosing which graphics processor runs a game can help a gaming laptop use its dedicated GPU instead of integrated graphics. how to set per-game GPU preferences in Windows 11 is a useful starting point for configuring individual games without changing every application’s settings. This guide covers the Windows menu, verification, limitations, and troubleshooting.
What Per-Game GPU Preferences in Windows 11 Really Mean
Windows 11 lets you assign a graphics preference to individual applications through Settings. On supported systems, you can generally choose between Power saving and High performance. The latter usually targets the GPU Windows considers more powerful, but it does not force every game to use a particular GPU in every hardware configuration.
1. Understand the Available Graphics Options
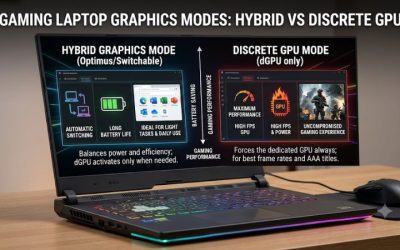
The Power saving option generally favors the GPU Windows identifies as more energy-efficient, often integrated graphics on a laptop with hybrid graphics. This can help reduce battery consumption when running lightweight applications, although actual power use depends on the workload and system design.
High performance generally selects the GPU Windows identifies as the higher-performance option, often a discrete NVIDIA GeForce or AMD Radeon GPU. This is commonly the appropriate preference for demanding games when you want them to use dedicated graphics rather than the integrated GPU.
2. Check Whether Your Laptop Has Two GPUs
Before changing anything, open Device Manager by right-clicking Start and selecting Device Manager. Expand Display adapters to see the graphics hardware Windows detects. A hybrid laptop might list both an integrated GPU and a discrete GPU, while other systems may show only one.
If only one graphics adapter appears, a per-game preference may offer little practical benefit. Check for missing drivers or hardware-specific configuration only if you have reason to believe another GPU should be present. A single-GPU desktop or laptop does not gain a second graphics processor from changing Windows settings.
3. Understand What the Setting Can and Cannot Change
A per-game preference tells Windows which graphics option to favor for a particular application. It does not increase the GPU’s physical capabilities, change its thermal limits, raise its configured Total Graphics Power (TGP), or guarantee a higher frame rate. Performance still depends on the game, processor, cooling, drivers, and power settings.
The preference also does not necessarily control every rendering or display decision made by a game, driver, or laptop firmware. Some manufacturers provide additional hybrid-graphics or GPU operating modes. Those controls may affect how graphics hardware is selected, so treat Windows preferences as one part of the overall configuration.
4. What Doesn’t Help
Changing every application to High performance is not necessary. Browsers, document editors, and other lightweight applications may not benefit from using a discrete GPU, while additional GPU activity can increase power consumption and heat.
Likewise, changing the preference repeatedly without checking which GPU a game actually uses makes troubleshooting harder. Start with the game you want to configure, change its individual setting, and verify the result before adjusting other Windows, driver, or manufacturer settings.
How to Set Per-Game GPU Preferences in Windows 11: Step by Step
The main process is to add the correct game executable to Windows Graphics settings, select High performance, save the preference, and relaunch the game. The setting is application-specific, so repeat the process for other games as needed. Menu labels may vary slightly between Windows 11 versions.
1. Open Windows Graphics Settings
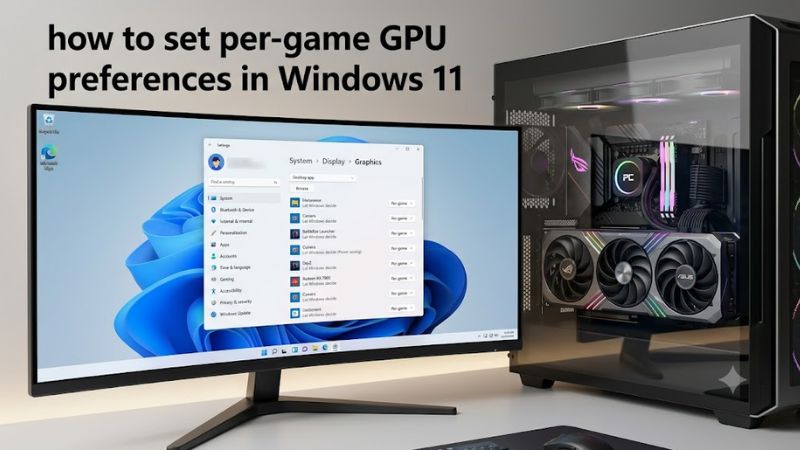
Press Windows + I to open Settings, then navigate to System > Display > Graphics. You can also type “Graphics settings” into Windows Search and open the corresponding system settings page. Look for the section that manages custom graphics options for applications.
Before proceeding, identify whether the game is a traditional desktop application or a Microsoft Store application. The method for adding it depends on its installation type. You do not need to change global graphics settings or edit the Windows registry to configure an individual game.
2. Add the Correct Game Executable
Under the application options, choose the desktop application option and select Browse if your game uses a conventional executable file. Navigate to the game’s installation folder, select its actual game .exe, and add it to the list. A launcher executable is not always the same as the executable that renders the game.
For a Microsoft Store application, use the appropriate Store-app selection method if it is available in your Windows version. If the game is already listed, select that entry rather than creating a duplicate. Choosing the correct executable matters because a launcher and the game it starts can have separate graphics preferences.
3. Select High Performance and Save
Select the game in the custom application list and choose Options. In the Graphics preference window, select High performance, then click Save. Windows will use this preference when launching the application, subject to supported hardware, drivers, and system configuration.
To set how to set per-game GPU preferences in Windows 11 for another title, repeat these steps for its executable. For a game that uses several separate executables, identify the actual rendering process before adding more entries. Avoid changing unrelated applications unless you have a specific reason.
4. Relaunch the Game and Verify the GPU
Completely exit the game after saving the preference, then start it again. If a launcher remains open, close the game itself rather than assuming that minimizing or returning to the main menu is sufficient. Graphics preferences generally take effect when the application starts, so an existing session may continue using its previous configuration.
To verify GPU activity, open Task Manager with Ctrl + Shift + Esc, select the Performance tab, and inspect the available GPU graphs while the game is running. Under Processes, you may also enable the GPU and GPU engine columns by right-clicking the column headings. Check activity during gameplay, not just at the title screen, because some games use the discrete GPU intermittently.
Windows 11 GPU Preference Comparison Table
| Setting or step | Where | Effect | Risk |
| Let Windows decide | Settings > System > Display > Graphics > Options | Allows Windows to choose an appropriate graphics processor | The selection may not match your preference |
| Power saving | Graphics preference for the selected app | Favors the more energy-efficient GPU | May reduce gaming performance if the game uses a less powerful GPU |
| High performance | Graphics preference for the selected app | Favors the GPU Windows identifies as higher performance | Can increase power consumption, heat, or fan noise |
| Save and relaunch | Graphics settings and the game | Applies the preference when the application starts | An incorrect executable may leave the actual game unaffected |
Troubleshooting Per-Game GPU Preferences
If the game continues using integrated graphics or performance does not change, verify the configuration before making additional adjustments. A saved preference does not necessarily mean the game is using the intended GPU, and higher GPU utilization alone does not establish that the setting has improved frame rates.
1. The Game Does Not Appear in Graphics Settings
Browse to the game’s installation folder and look for its actual executable. If you use a game launcher, its installation or management page may help identify the game directory. Avoid selecting an unrelated updater or launcher when your goal is to configure the rendering application.
If the executable still cannot be found, check whether the game uses a Microsoft Store installation or another packaged application format. The correct selection method depends on the application type. Do not download replacement executable files from unofficial websites to make a game appear in the list.
2. High Performance Does Not Appear to Change GPU Usage
First, confirm that the laptop has both integrated and discrete graphics hardware. Open Device Manager, expand Display adapters, and check for the expected devices. If the discrete GPU is missing or shows a warning, investigate the driver or device issue before assuming the preference is broken.
Next, make sure you selected the actual game executable and restarted the game. Some laptops also offer a Hybrid, Optimus, or discrete-GPU-only mode through manufacturer software or firmware. These modes affect the overall graphics configuration, so consult the laptop manufacturer’s documentation before changing them.
3. NVIDIA Control Panel or AMD Software Shows Different Options
Windows Graphics settings can take priority over application-level GPU preferences configured through graphics-driver software. For NVIDIA systems, NVIDIA’s support guidance explains that Windows manages GPU selection for applications on modern Windows versions. Some older instructions referring to a context-menu option for selecting the GPU no longer apply.
If a driver utility offers additional per-application settings, check the Windows preference first and consult the manufacturer’s current documentation for your driver version. Avoid changing several overlapping controls at once. Make one change, relaunch the game, and verify which GPU performs the rendering work.
4. Performance Does Not Improve After Changing the Preference
A game may already be using the discrete GPU, in which case changing the preference may produce no measurable improvement. Low frame rates can also result from CPU limitations, thermal throttling, insufficient memory, background workloads, graphics settings, or power restrictions. GPU preference is not a universal performance fix.
If you want to determine whether the setting helps, compare the same game scene with the same resolution, graphics preset, upscaling options, and power mode. Record frame rates and relevant CPU and GPU utilization before and after the change. Avoid drawing conclusions from different scenes or brief fluctuations.
Frequently Asked Questions
Does Windows 11 let you choose a GPU for each game?
Yes, Windows 11 provides per-application graphics preferences on supported systems. Open Settings > System > Display > Graphics, select or add the game, choose Options, and select the desired preference. The available choices depend on the system’s graphics hardware and Windows configuration.
Should every game use High performance?
No, only assign High performance when the game benefits from the more powerful GPU or is not selecting it appropriately. Demanding 3D games are common candidates, while lightweight applications may work well with Windows’ default selection. High performance can increase power consumption and heat without improving a CPU-limited game.
Do I need NVIDIA Control Panel or AMD Software?
No, Windows Graphics settings are sufficient for the basic per-game preference. Manufacturer software may provide additional controls, but available features vary by GPU, driver, and laptop. If the settings appear inconsistent, check the Windows preference first and consult the relevant manufacturer’s documentation before changing other controls.
Will changing the GPU preference increase FPS?
It can improve performance if a game was using a less capable GPU and switching to the discrete GPU removes that limitation. It will not necessarily help if the game already uses the correct GPU or is limited by another component. Compare consistent gameplay conditions to determine whether the change makes a meaningful difference.
Final Thoughts
Learning how to set per-game GPU preferences in Windows 11 gives you a straightforward way to manage graphics selection without changing every application’s configuration. Set demanding games to High performance when appropriate, retain sensible defaults elsewhere, and verify actual GPU activity. If performance remains low, investigate the underlying bottleneck before making further changes.