Benchmarking a gaming laptop consistently means running the same workload under controlled conditions and recording results that can be compared fairly. How to benchmark a gaming laptop consistently comes down to controlling power settings, temperature, graphics options, software versions, and measurement methods. This guide explains how to build a repeatable process for checking gaming performance, frame times, and sustained GPU behavior.
What Consistent Gaming Laptop Benchmarking Really Comes Down To
A useful benchmark measures how a complete laptop performs under a defined workload, not just what its CPU or GPU model suggests. Power limits, cooling, memory configuration, and firmware can all affect results. Before running anything, decide whether you want to measure peak performance, sustained performance, or changes after a settings adjustment.
1. Separate Peak Performance From Sustained Performance
A short benchmark can reveal how a laptop performs during a brief workload, but it cannot fully describe what happens during a longer gaming session. As heat builds up, the system may adjust clock speeds, fan behavior, and power consumption according to its thermal and electrical limits.
Use a short benchmark for a quick performance snapshot and a repeated or extended workload to examine consistency over time. UL Solutions recommends 3DMark Stress Tests for mobile hardware because longer runs can expose changes associated with heat buildup and cooling.
2. Control the Laptop’s Power and Cooling Conditions
Keep the laptop plugged into its normal, manufacturer-supplied power adapter for performance comparisons. Use the same manufacturer performance profile, fan mode, Windows power configuration, and display setup for every run. A Quiet profile and a Performance profile can produce different results even when the hardware is identical.
Place the laptop on the same hard, flat surface with its air intakes unobstructed. Keep the surrounding environment reasonably stable and allow temperatures to settle before starting. Record the ambient conditions when possible, particularly if you are comparing cooling performance rather than simply checking FPS.
3. Understand FPS, Frame Times, and Temperature
Average frames per second (FPS) summarizes rendering performance, but it does not describe every aspect of smoothness. Frame-time data shows how long individual frames take to render, helping reveal irregular pacing and intermittent stutters that an average can conceal.
Temperature and power readings add context to those results. A higher temperature does not automatically mean a laptop is performing poorly, and a lower temperature does not automatically mean it is faster. Interpret readings alongside FPS, frame times, GPU power, clock speeds, and the duration of the workload.
What Doesn’t Help
Changing several settings between runs makes it difficult to identify why the score changed. Closing background applications before one run but not another, changing fan modes, or switching between battery and AC power introduces variables that can undermine the comparison.
Avoid treating one unusually high score as the laptop’s normal performance. Do not use RAM cleaners, registry boost scripts, or disabling Windows telemetry as benchmark preparation. Instead, keep the system configuration consistent, document unavoidable changes, and repeat questionable results before drawing conclusions.
How to Benchmark a Gaming Laptop: Step by Step
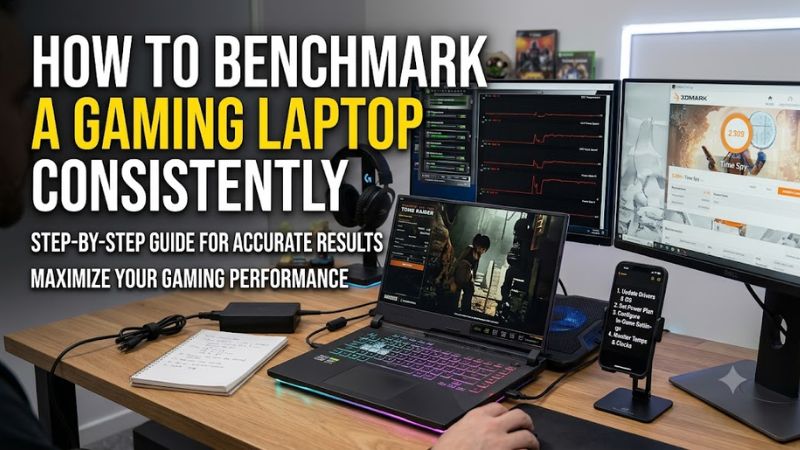
The most reliable workflow uses a fixed test scene or built-in benchmark, identical graphics settings, repeat runs, and saved results. Start with a baseline before changing anything, then use synthetic benchmarks and actual games for different purposes. The table below summarizes the main steps, where to perform them, and the risks to watch for.
| Setting or Step | Where | Effect | Risk |
| Establish a baseline | Windows and manufacturer control app | Records the starting configuration | Missing details make later comparisons unreliable |
| Standardize power settings | Windows and laptop control app | Reduces power-profile variation | Performance mode increases fan noise and power use |
| Repeat a fixed benchmark | Game benchmark menu or 3DMark | Measures repeatability and performance | Different versions or presets invalidate comparisons |
| Capture FPS and temperatures | Game telemetry or CapFrameX | Adds frame-time and hardware context | Monitoring overhead can affect results slightly |
Step 1: Record the Laptop’s Exact Configuration
Before benchmarking, record the complete laptop model, CPU, GPU, installed RAM, storage, Windows version, graphics driver, BIOS version, and display resolution. Also note whether the GPU is operating with its integrated or discrete graphics configuration where that distinction is relevant. Two laptops with the same GPU name may have different power limits and cooling capabilities.
Create a simple log containing the benchmark name and version, date, power profile, graphics preset, resolution, ray tracing, upscaling, frame generation, and average FPS. Mark information you cannot confirm as unknown rather than guessing. This record helps distinguish an actual performance change from a change in the test environment.
Step 2: Standardize Power and Display Settings
Connect the original power adapter and choose a consistent performance profile through the laptop manufacturer’s control application. Set Windows power options consistently, and use the same fan profile for every run. The highest-performance mode is useful when measuring maximum plugged-in gaming performance, while Balanced is more representative if that is how you normally play.
Keep the display resolution, refresh rate, external-monitor connection, and graphics routing consistent. On supported NVIDIA notebooks, the NVIDIA Control Panel’s power-mode options can include Performance, Balanced, and Quiet; available controls depend on the hardware and software configuration. Do not assume that every laptop exposes the same options.
Step 3: Run the Same Workload Multiple Times
Choose a game with a repeatable built-in benchmark, or use a fixed route in a game that lacks one. Keep the game version, scene, graphics preset, resolution, and advanced options unchanged. Avoid comparing an open-world gameplay session with a built-in benchmark sequence because their CPU, GPU, and streaming demands can differ.
Run the benchmark several times and record every result. A practical personal workflow is to perform one initial run, then collect three additional runs under the same conditions. If the initial result differs substantially, investigate shader compilation, background activity, or temperature changes instead of automatically discarding it. The RTINGS methodology offers one published example of repeated game runs, retaining the last three of four high-setting runs.
Step 4: Capture FPS, Frame Times, and Hardware Behavior
Use the game’s built-in performance display when average FPS is sufficient. For more detailed analysis, CapFrameX can capture frame-time data and provide FPS statistics, distributions, and comparisons between recorded runs. Its documentation also describes optional hardware-sensor logging, which can help correlate performance changes with GPU or CPU behavior.
Record average FPS and, when available, 1% lows or frame-time percentiles. Log CPU and GPU temperatures, GPU power, and clock speeds during the same workload if those readings are available. Keep monitoring settings consistent between runs. If an overlay appears to affect performance or causes compatibility problems, repeat the capture with a simpler measurement method.
How to Interpret Results and Keep Comparisons Fair
Once the runs are complete, compare the results using the same metrics and conditions. A score is meaningful only in the context of its workload and configuration. Synthetic tests can help isolate graphics or CPU performance, while real-game tests show how the laptop handles a specific title. Extended tests reveal behavior that a brief run may miss.
1. Compare Results Using Matching Conditions
Compare a laptop against its own baseline first. When comparing different machines, match the benchmark version, resolution, graphics preset, ray-tracing state, upscaling mode, and frame-generation configuration wherever possible. Record the CPU, GPU variant, memory configuration, and power mode for each system.
Do not combine scores from different benchmark versions or game scenes into a single ranking without a defensible normalization method. If a review does not disclose enough test details, treat its results as context rather than a direct comparison. A higher score from a different workload does not establish that one laptop is faster under your preferred settings.
2. Separate Synthetic Benchmarks From Real Games
3DMark runs defined graphics workloads and produces scores designed for comparison within the relevant benchmark. Use a suitable test for the hardware and feature set you want to examine, then run actual games that reflect your gaming priorities. Neither type of result should be treated as a complete substitute for the other.
A synthetic graphics score can help identify broad performance differences, but it does not directly predict FPS in every game. CPU limits, game-engine behavior, memory, graphics settings, and driver support can change the outcome. UL Solutions provides benchmark-specific guidance explaining how 3DMark tests work and how to interpret their scores.
3. Check for Thermal or Power-Related Changes
If FPS declines across repeated runs, compare the frame-time records with temperature, clock speed, and power readings. A performance decline alongside rising temperatures may indicate heat-related behavior, but temperature alone does not establish thermal throttling. A power limit, CPU bottleneck, background task, or changing workload can produce a similar pattern.
Use the laptop manufacturer’s monitoring software or an appropriate hardware-monitoring utility to inspect available sensor data. Compare sustained readings rather than relying exclusively on a single maximum temperature. Laptop CPU and GPU limits vary by model, so interpret readings against manufacturer guidance rather than applying one universal temperature threshold.
4. Decide Whether a Result Is Repeatable
Calculate the average of the repeated runs and inspect the spread between the highest and lowest results. If results vary substantially, repeat the procedure after checking background processes, power settings, temperature, and benchmark consistency. Keep unusual runs in your log with an explanation instead of deleting inconvenient results without justification.
For a simple comparison, you can calculate the percentage difference between two average FPS results:
\[ \text{Difference (\%)} = \frac{\text{New FPS}-\text{Baseline FPS}} {\text{Baseline FPS}}\times100 \]
A positive value means the new average is higher; a negative value means it is lower. This calculation describes the observed change, not its cause. Repeat the comparison before attributing a small difference to a driver update, cooling change, or performance setting.
FAQ
How many times should I benchmark a gaming laptop?
Run the same benchmark multiple times, with one initial run followed by three recorded runs as a practical starting point. If the results vary substantially, investigate the conditions and repeat the test rather than relying on a single score.
Should I benchmark a gaming laptop while plugged in or on battery?
Use AC power when measuring maximum plugged-in gaming performance, and keep the power profile and adapter consistent. If you want to understand battery gaming performance, run a separate test on battery and label those results clearly.
Which benchmark is better: 3DMark or an actual game?
Use both when possible because they answer different questions. 3DMark provides a standardized graphics workload, while an actual game reveals performance in a particular title. For a buying decision, prioritize game results that match your preferred resolution and settings.
Why does my gaming laptop get a different FPS score every time?
Different FPS scores can result from temperature, background processes, power profiles, shader compilation, or changes in the workload. Check that the benchmark scene and settings match, inspect the system’s power and temperature readings, and repeat the runs before diagnosing a hardware problem.
Final Thoughts
Learning how to benchmark a gaming laptop consistently starts with a fixed workload, a stable power profile, matching graphics settings, and repeatable measurements. Save the configuration alongside every result, then compare average FPS, frame times, and sustained behavior. Establish a baseline before changing drivers, cooling settings, or performance options so each result remains useful.