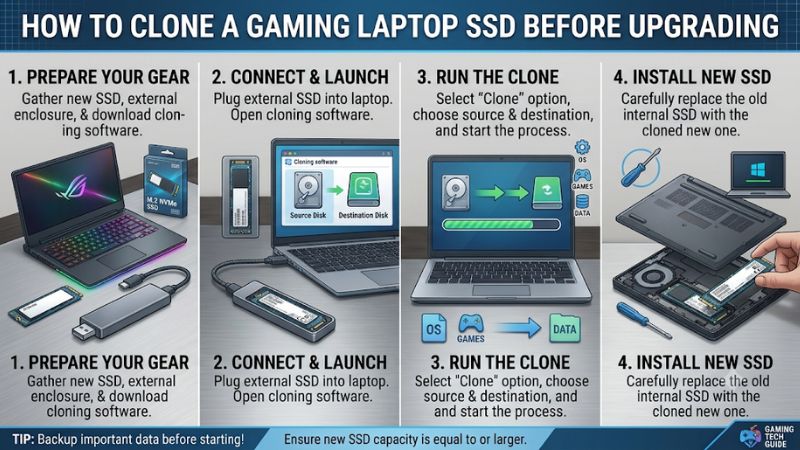
How to clone a gaming laptop SSD before upgrading is an important skill when moving to a larger or faster storage drive without reinstalling Windows, games, and applications. The process involves preparing a compatible replacement SSD, creating a complete disk clone, checking the copied data, and safely installing the new drive.
What Cloning a Gaming Laptop SSD Really Comes Down To
Cloning copies the existing SSD’s partitions and data to another drive, allowing the replacement to retain Windows, installed games, applications, and supported boot information. Unlike a clean installation, this approach preserves much of the existing software environment, provided the destination drive is compatible and the cloning process completes correctly.
1. Understand What SSD Cloning Actually Copies
An SSD clone is more than a copy of the files visible in File Explorer. A complete system-disk clone should include the Windows partition, EFI System Partition, recovery partition, and other necessary boot or system partitions. Missing these components can leave the replacement drive unable to start Windows.
For gaming laptops, preserving the existing installation can save considerable setup time. Steam libraries, game launchers, graphics drivers, configuration files, and installed applications can remain available after migration. However, some applications may request activation again, and individual games may require launcher verification.
2. Check the Replacement SSD Compatibility
Before learning how to clone a gaming laptop SSD before upgrading, identify the storage interface supported by the laptop. Many modern gaming laptops use M.2 NVMe SSDs, but older models may use SATA storage or provide different configurations. An M.2 connector alone does not establish NVMe compatibility.
Check the manufacturer’s service manual or storage specifications for supported interfaces, physical dimensions, and installation restrictions. Common M.2 lengths include 2230, 2242, and 2280. Some laptops have only one internal SSD slot, meaning the replacement drive must connect externally during cloning.
3. Understand Capacity and Performance Differences
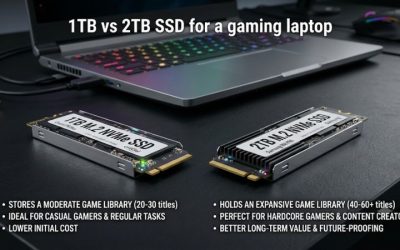
The replacement SSD should have enough usable capacity for the partitions being cloned. A larger destination drive is generally easier to work with because it provides additional space for future games, Windows updates, and other files. A smaller destination requires a cloning tool that supports partition resizing and sufficient free space.
A faster SSD does not automatically produce a proportional increase in gaming performance. Storage upgrades can improve installation times, file transfers, and some loading operations, but actual results depend on the laptop, game engine, and storage workload. CPU and GPU limitations remain separate factors.
4. What Doesn’t Help
Copying the Windows folder manually to another SSD does not create a complete bootable replacement. Windows relies on partition structures, boot files, recovery information, and firmware configuration that ordinary file copying does not reproduce.
Similarly, moving only the Steam or Epic Games library does not migrate the complete operating system. It may preserve selected game files, but Windows, drivers, applications, and other system components still require separate installation or migration. Use a full-disk cloning process when the goal is to replace the existing system drive.
How to Clone a Gaming Laptop SSD: Step by Step
The practical process starts with a backup and a compatibility check, followed by connecting the new SSD through an appropriate enclosure or adapter. The source drive remains inside the laptop while the cloning software copies its partitions to the destination. Once complete, the new SSD can replace the original drive.
| Setting or Step | Where | Effect | Risk |
| Back up important files | External storage or cloud | Protects personal data | Backup may be incomplete |
| Check drive encryption | Windows Settings | Identifies BitLocker or Device Encryption | Recovery key may be unavailable |
| Connect replacement SSD | Compatible USB enclosure | Makes the destination accessible | Incorrect enclosure compatibility |
| Clone the entire disk | Cloning software | Copies Windows and system partitions | Destination data is overwritten |
| Install replacement SSD | Laptop storage compartment | Makes the new drive internal | Physical damage or incorrect installation |
1. Prepare Windows and Back Up Important Data
Start by checking the existing SSD’s capacity and used space. Open File Explorer, select This PC, and inspect the available storage. You can also open Disk Management by right-clicking Start and selecting Disk Management to examine the drive’s partitions.
Create a separate backup of documents, saved files, important game data, and other irreplaceable information. Cloud synchronization is useful for supported folders, while an external drive provides another recovery option. Do not treat the cloning process itself as a backup because a failed operation or incorrect destination selection can result in data loss.
2. Check BitLocker and Device Encryption
Windows 11 and some Windows 10 gaming laptops use BitLocker or automatic Device Encryption. Before cloning, check encryption status and locate the associated recovery key. You can inspect encryption through Settings or search Windows for Manage BitLocker, depending on your edition and configuration.
Microsoft explains that hardware or boot-configuration changes can trigger a BitLocker recovery request. Save the 48-digit recovery key somewhere separate from the laptop before proceeding. If the encryption software or cloning utility requires protection to be suspended, follow its documented instructions and resume protection after migration. Never disable encryption without understanding the security implications.
3. Connect the New SSD and Select Cloning Software
If your laptop has one internal M.2 slot, use a compatible USB-to-NVMe enclosure to connect the replacement drive. Check that the enclosure supports the SSD’s interface and physical dimensions. An NVMe enclosure will not automatically work with an M.2 SATA SSD, so verify compatibility before purchasing or connecting one.
For a free disk-cloning option, Clonezilla Live supports direct disk-to-disk cloning. Its official documentation describes booting from USB, choosing device-to-device mode, and selecting the source and destination drives. Some SSD manufacturers also provide migration utilities for their own drives, subject to the software’s current compatibility requirements.
4. Clone the Entire System Disk
After preparing the destination SSD, open your selected cloning utility and identify the existing internal SSD as the source. Select the replacement SSD as the destination. Verify the drive capacities and model identifiers before confirming the operation because the destination’s existing contents may be overwritten.
Choose an entire-disk cloning option rather than copying only the Windows partition. This allows the software to migrate the necessary system and boot partitions. If the replacement drive is larger, check whether the cloning utility automatically expands the Windows partition or leaves additional space unallocated. Clonezilla documents that its default behavior can leave unused destination capacity, with partition-table options available for using the additional space.
clonezilla.org+1
5. Verify the Clone Before Replacing the Original SSD
Wait until the cloning utility reports completion. Do not disconnect the enclosure or interrupt the laptop’s power during the process. Once cloning finishes, inspect the destination drive’s partitions using the software’s verification features or an appropriate disk-management utility.
Check that the destination contains the expected Windows, EFI, and recovery partitions. If the cloning utility provides a verification or comparison function, use it before removing the original drive. A successful completion message is useful, but it should not replace an actual boot check.
How to Install and Verify the Cloned Gaming Laptop SSD
Completing the clone does not automatically establish that the replacement drive will boot correctly. The laptop must recognize the new SSD, Windows must load from the intended drive, and the operating system should retain access to its applications and data. A careful first boot also helps identify partition-sizing or encryption problems before the original drive is reused.
1. Shut Down and Replace the Internal SSD
Completely shut down Windows, disconnect the charger, and remove connected peripherals. Follow the laptop manufacturer’s service manual for opening the bottom cover and disconnecting the internal battery when the design permits or requires it. Avoid working on the laptop while it is powered.
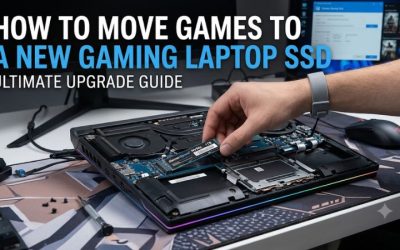
Remove the original SSD carefully and install the cloned replacement in the appropriate slot. Secure it using the correct mounting screw or retention mechanism. Do not force the connector or bend the drive. Some gaming laptops use thermal pads or shielding over their storage devices, so reinstall these components according to the manufacturer’s instructions.
2. Boot From the Replacement Drive
Turn on the laptop and check whether Windows starts normally. If the laptop opens its firmware setup or boot menu instead, inspect the detected storage devices and boot priority. The exact key varies by manufacturer, so consult the laptop manual rather than assuming every system uses the same shortcut.
For the first boot, keep the original SSD disconnected whenever practical. Clonezilla also warns about booting with both identical cloned drives connected because duplicate filesystem identifiers can create confusion on some systems. Keeping only the replacement installed makes it easier to determine which drive Windows is using.
clonezilla.org+1
3. Check Windows, Games, and Available Capacity
After Windows starts, open Settings and confirm that the operating system loads normally. Open Disk Management to inspect the replacement drive’s partitions and determine whether any additional capacity remains unallocated. If necessary, use Windows’ supported partition-management options to extend the appropriate volume after confirming its layout.
Next, open Steam, Epic Games, Xbox, and other installed launchers. Check whether your game libraries are available and whether applications recognize their existing installation folders. Some launchers may require a library scan or file verification. Also check saved games, controller software, graphics drivers, and important application settings.
4. Keep the Original SSD Until Everything Works
Do not immediately erase, format, or repurpose the original SSD. Keep it untouched until Windows boots consistently, important files are accessible, games launch, and the replacement drive is correctly recognized. This provides a practical fallback if the clone has missing data or boot-related problems.
Once the replacement is working, you can decide whether to reuse the original SSD as external storage or retain it as a temporary recovery drive. If you reuse it, remember that formatting will remove its existing contents. Confirm that the replacement contains everything important before taking that step.
FAQ
1. Can I clone a gaming laptop SSD without reinstalling Windows?
Yes, a complete system-disk clone can preserve Windows and its existing applications without requiring a clean installation. The destination must be compatible, and the cloning software must copy the necessary system and boot partitions. Encryption and hardware changes can still trigger recovery or activation requirements.
2. Can I clone a 512GB SSD to a 1TB SSD?
Yes, provided the destination is compatible and the cloning utility supports the partition layout. The additional capacity may remain unallocated until you expand the Windows partition. Check the cloning software’s partition-resizing options before starting.
3. Will cloning an SSD improve gaming FPS?
No, cloning itself does not increase FPS because it copies data rather than changing CPU or GPU performance. Replacing an older storage drive may improve certain loading and file-transfer operations, but average FPS and frame pacing depend on other hardware and software factors.
4. What should I do if the cloned SSD does not boot?
First, check whether the replacement drive is detected in the laptop’s firmware and whether the correct Windows Boot Manager entry is selected. If it remains unbootable, inspect the EFI and Windows partitions and use Windows Recovery Environment or manufacturer recovery tools where appropriate. Keep the original SSD unchanged until the problem is resolved.
Final Thoughts
Learning how to clone a gaming laptop SSD before upgrading helps preserve Windows, installed games, and applications while moving to larger storage. The most important steps are checking compatibility, backing up data, protecting encryption keys, and verifying the cloned drive. Keep the original SSD until the replacement boots reliably.
Related guides
More from Amazon
Programs that pair well with the guide above. Offers and eligibility are set by Amazon and may change.
Free shipping on eligible items, Prime Video and more. Eligible new members can start with a free trial.
Start a Prime free trialAd-free music streaming. Eligible new subscribers can start with a free trial.
Try Music Unlimited freeA Prime membership for ages 18-24 with a trial period. Eligibility is set by Amazon.
See Prime for Young AdultsAudiobooks and podcasts to listen to on the go. Eligible new members can start with a free trial.
Try Audible freeAs an Amazon Associate we earn from qualifying purchases.