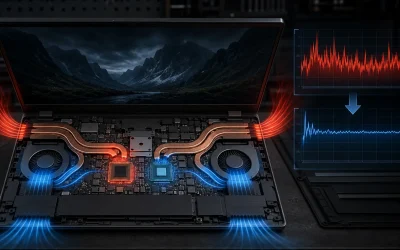
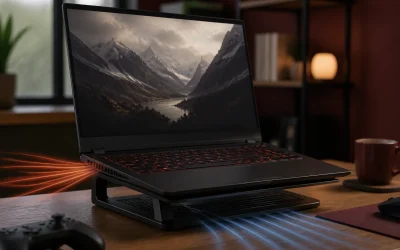
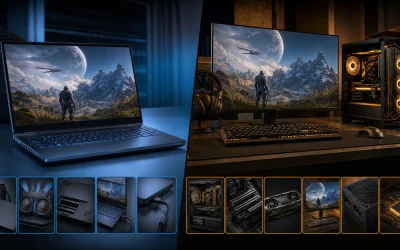
You can upgrade a gaming laptop’s RAM and storage yourself in about twenty minutes with a single screwdriver, but the CPU and GPU are soldered to the motherboard on nearly every model sold today and cannot be swapped. That distinction matters more than any other fact in this guide, because it decides whether your laptop’s performance ceiling is fixed at purchase or can grow with your needs. The good news is that RAM and storage are also the two upgrades that most directly affect real-world stutter, load times, and multitasking headroom, so the parts you can actually change happen to be the ones that matter for day-to-day use.
This guide walks through exactly what is and is not upgradeable, how to check your specific model before buying parts, the tools and steps for a RAM and SSD swap, and what to do if something goes wrong after you reassemble the machine. None of this requires soldering experience or specialty tools beyond a small screwdriver and a plastic spudger, and the risk of damage is low as long as you follow the discharge and clip-release steps in order.
As an Amazon Associate we earn from qualifying purchases at no extra cost to you.




Top 3 picks at a glance
What You Can Actually Upgrade on a Gaming Laptop
Two components are realistically upgradeable on almost every modern gaming laptop: system memory (RAM) and internal storage (SSD). Both typically sit behind a single bottom access panel held on by six to twelve Phillips screws, and manufacturers design that panel specifically for end-user servicing because RAM and storage are the two parts most likely to need a bump after purchase. A smaller number of models also let you swap the Wi-Fi card or add a second SSD into an empty M.2 slot, which is worth checking for on mid-range and larger 16 to 18 inch chassis.
Battery is technically replaceable on most laptops too, though it is glued or clipped rather than designed for casual swapping, and doing it yourself is really a repair task rather than an upgrade. The keyboard, trackpad, speakers, and webcam can sometimes be replaced with OEM parts if they fail, but these are again repairs, not performance upgrades, and most buyers never touch them.
Cooling paste (thermal compound) between the CPU/GPU and the heatsink is technically replaceable, and a small subset of enthusiasts repaste laptops after two or three years to recover lost thermal headroom as factory paste dries out. This is a legitimate upgrade path for sustained-load performance, but it requires fully disassembling the chassis past the RAM and SSD panel, and it carries real risk of breaking plastic clips on tightly packed 14 and 15 inch models, so it is not something we recommend for a first-time upgrader.
Display panels are occasionally swappable between two SKUs of the exact same chassis (for example a 144Hz panel replaced with the 240Hz panel offered on the higher trim), but panel availability, connector compatibility, and EDID/timing controller differences make this an advanced, model-specific project rather than a general upgrade path. Search your exact model number plus “panel swap” before assuming this is possible.
Finally, external upgrades count too. A USB4 or Thunderbolt port lets you attach an external GPU enclosure, though the bandwidth ceiling (roughly 32 to 40 Gbps depending on the port generation) means an eGPU rarely matches a laptop’s internal GPU performance one-for-one; it is best thought of as a way to add a display-out and extra compute for creative work rather than a true gaming upgrade. If external storage speed matters to you, a USB 3.2 Gen 2 or Thunderbolt NVMe enclosure can also supplement, rather than replace, an internal upgrade.
RAM Upgrades: Capacity, Speed, and Compatibility
Most current gaming laptops ship with two SO-DIMM slots supporting DDR5, though budget and slightly older models may still use DDR4. Before buying anything, look up your exact model number (not just the product line) on the manufacturer’s support site or in a tool like CPU-Z to confirm the RAM type, maximum supported capacity, and whether both slots are populated from the factory or one is left empty for exactly this kind of upgrade.
Capacity is the upgrade that matters most for gaming. 16GB is the realistic floor for current titles at 1080p, and many recent AAA releases recommend 32GB when running alongside Discord, a browser with dozens of tabs, and an overlay like GeForce Experience or a streaming client. If your laptop shipped with a single 8GB or 16GB stick in one slot and an empty second slot, adding a matched second stick to reach 32GB total is usually the single highest-value laptop upgrade under $80.
Speed (measured in MT/s, such as DDR5-5600 or DDR5-6400) affects integrated graphics and some CPU-bound titles more than discrete-GPU gaming, where the difference between DDR5-5600 and DDR5-6400 is typically 2 to 5 percent in framerate. Matching your new stick’s speed to your existing stick, or to what the motherboard actually supports, matters more than chasing the highest rated speed on the box, since mismatched kits often run at the slower module’s rated speed or fail to boot entirely.
Dual-channel configuration matters as much as total capacity. Two 8GB sticks in dual-channel mode outperform a single 16GB stick in most games because memory bandwidth roughly doubles, which is why manufacturers that ship single-stick configurations are cutting a corner worth fixing. If you are buying new RAM, buy a matched kit of two identical sticks rather than mixing a new stick with your old one, even if the old stick is technically compatible, because timing mismatches can cause instability under sustained load.
Check your chassis’s maximum supported capacity before buying, since some thin-and-light 14 inch chassis cap out at 32GB total while larger 16 to 18 inch machines built around higher-end platforms may support 64GB or more across two slots.
Storage Upgrades: Adding or Swapping an SSD
Nearly every gaming laptop released in the last several years uses M.2 NVMe SSDs rather than 2.5 inch SATA drives, connecting over a PCIe interface that supports sequential read speeds from roughly 3,500 MB/s (Gen3) up to 7,000+ MB/s (Gen4) depending on the drive and the motherboard’s slot generation. Confirm which generation your specific M.2 slot supports before paying extra for a Gen4 or Gen5 drive, since a Gen4 drive in a Gen3 slot will simply run at Gen3 speeds and waste the price premium.
Capacity planning should account for modern game install sizes, which regularly run 80 to 150GB for AAA titles with high-resolution texture packs; a 1TB drive holds roughly six to ten such titles comfortably, while 2TB gives realistic breathing room for a library plus Windows, drivers, and recording software. If your laptop has a single occupied M.2 slot and a second empty one, adding a second drive is simpler and lower-risk than cloning your existing drive, since it avoids any cloning software or data-loss risk entirely.
If you are replacing rather than adding a drive, cloning software (Samsung Magician, Crucial Acronis-based tools, or free options like Macrium Reflect) copies your existing Windows installation, activation state, and files onto the new drive before you physically swap it, which avoids a fresh Windows install and driver reconfiguration. Clone to the new drive first, verify it boots by temporarily connecting it externally via a USB-C NVMe enclosure, and only then physically swap the drives.
Watch for drive length compatibility: laptops typically use the 2280 form factor (22mm wide, 80mm long), but some ultra-thin models use the shorter 2242 or 2230 size, and a mismatched drive simply will not fit the slot’s screw mount even though the connector is electrically identical. Double-check this measurement in your model’s teardown guide or service manual before ordering.
Thermal pads on the SSD slot matter more on gaming laptops than desktops because M.2 drives in a cramped chassis can throttle under sustained write loads; if your new drive does not come with its own thermal pad and your chassis has one built into the shield covering the original slot, transfer or reuse that pad rather than running the new drive bare against plastic.
Checking Warranty and Opening Your Laptop Safely
Before removing a single screw, look up your exact model’s warranty terms, since most major manufacturers explicitly permit RAM and storage upgrades through the designated bottom access panel without voiding coverage, but a smaller number of ultra-thin or workstation-class SKUs use a warranty-void-if-removed sticker over one or more screws. If such a sticker exists over the RAM/SSD panel specifically (rather than over the main chassis screws), that is a strong signal the manufacturer does not intend that panel to be user-serviced.
Power the laptop off completely rather than putting it to sleep, unplug the charger, and hold the power button for ten seconds to discharge residual capacitor charge. Remove the battery if your model has a physical battery disconnect switch or an easily accessible battery connector, since working on a live board increases the risk of a short if a screwdriver slips against an exposed contact.
Ground yourself before touching any internal component. An anti-static wrist strap clipped to an unpainted metal part of the chassis is ideal, but touching a grounded metal object (an unpainted radiator, a plugged-in but powered-off desktop case) for a few seconds beforehand is an acceptable substitute if you do not own a strap. Static discharge is invisible and can degrade a RAM module or SSD controller without any obvious symptom until it fails weeks later.
Work on a hard, flat, well-lit surface and keep screws organized by removing them into a small dish or magnetic mat, since laptop screws vary in length by less than a millimeter between mounting points and using the wrong length screw can either fail to seat properly or crack the plastic chassis if forced. Photograph the panel layout before removal if you are working on your first laptop teardown, as a visual reference removes most of the guesswork during reassembly.
According to Aaron Whitfield, Mobile Systems Editor with a decade of detailed research using a thermal camera, battery-drain logger and standardized sustained-load benchmark suite, the single most common mistake first-time upgraders make is forcing a panel clip before locating every screw, which cracks plastic tabs that are otherwise reusable indefinitely if released in the correct order.
Tools and Parts You Need Before You Start
A precision Phillips screwdriver in #00 or #0 size covers the vast majority of laptop screws; a full 30-piece precision bit set costs under $15 and is worth owning if you plan to do this more than once, since a screwdriver that is even slightly the wrong size strips screw heads on the second or third attempt. Magnetic tips help prevent dropped screws inside the chassis, which is a genuine risk on laptops with dense internal layouts.
A plastic pry tool or spudger separates clipped bottom panels without scratching the aluminum or plastic chassis; metal tools or a flathead screwdriver work in a pinch but risk gouging the finish or, worse, shorting a component if the tool slips against an exposed board trace. Guitar picks and old gift cards also work as improvised spudgers if you do not want to buy a dedicated tool.
For the RAM itself, buy a matched kit specifically listed as compatible with your model or, at minimum, matching your existing stick’s type (DDR4 or DDR5), voltage, and CAS latency where possible. For storage, buy an NVMe SSD in the correct physical length (2280, 2242, or 2230) and PCIe generation your slot supports, from a brand with a five-year warranty, since laptop SSDs endure more thermal cycling than desktop drives.
If you are replacing rather than adding a drive, you will also need cloning software and, ideally, a USB-C to NVMe enclosure (roughly $15 to $25) to connect the new drive externally for the clone step before the physical swap. This single accessory removes the most common point of failure in a storage upgrade, which is cloning to a drive that turns out to have a bad sector or connection issue you only discover after reassembly.
An anti-static wrist strap rounds out the kit at under $10 and, combined with the screwdriver, spudger, and thermal paste (if you plan to repaste), covers essentially every tool a RAM or storage upgrade requires without needing a full electronics toolkit.
Step-by-Step: Installing New RAM
Start by fully powering down the laptop, unplugging it, and discharging residual charge by holding the power button for ten seconds. Flip the laptop over, remove every screw from the bottom panel (setting them aside in order), and use a plastic spudger to release the clips around the panel’s edge, working slowly from one corner rather than prying multiple points at once.
Locate the RAM slots, which are typically covered by a small metal shield or sit exposed near the center-rear of the board. Ground yourself, then release the existing module (if present) by spreading the two retention clips outward until the stick pops up at roughly a 30-degree angle, then slide it out gently by the edges without touching the gold contacts.
Align the new module’s notch with the slot’s key, insert it at the same 30-degree angle, and press down firmly and evenly until both retention clips snap closed on their own. If the clips do not close automatically, the module is not fully seated; do not force the clips closed manually, as this can crack the module’s PCB.
Repeat for the second slot if you are adding or upgrading both sticks, then replace the bottom panel screws in the reverse order you removed them, starting from the corners and working inward to avoid warping the panel. Power the laptop on and confirm the new capacity is recognized before fully reassembling, by checking Task Manager’s Performance tab or the About page in Windows Settings.
If the laptop does not boot or shows the wrong capacity, power off, remove the panel again, and reseat both modules firmly, since an improperly seated stick is the overwhelming majority cause of a failed RAM upgrade and is rarely a sign of a defective module or damaged slot.
Step-by-Step: Installing a New SSD
If replacing an existing drive, connect the new SSD to your laptop externally via a USB-C NVMe enclosure first, and use cloning software to copy your current drive’s contents, including the Windows boot partition, onto the new drive. Verify the clone completed without errors and, if possible, boot from the external drive briefly to confirm Windows starts correctly before proceeding to the physical swap.
Power down, discharge, and open the bottom panel following the same steps as the RAM upgrade. Locate the M.2 slot, which is usually secured by a single small screw holding the drive at an angle, sometimes under a thermal shield that lifts off after removing its own retaining screws.
Remove the retaining screw, and the existing drive will spring up slightly at roughly a 20-degree angle; slide it out gently from the connector. If you are adding a second drive rather than replacing the first, simply insert the new drive into the empty slot at the same angle.
Insert the new (or cloned) drive into the slot’s connector at the same angle, press it flat against the standoff, and replace the retaining screw. If your chassis included a thermal pad over the original drive, reposition it over the new drive before closing the shield, since running an NVMe drive without its thermal pad under sustained write loads (such as installing a 100GB game) can trigger thermal throttling of the SSD controller itself, dropping write speeds by more than half.
Reassemble the bottom panel, power on, and check Disk Management (search “Create and format hard disk partitions” in Windows) to confirm the new drive is recognized at its full advertised capacity. If you added a second drive rather than cloning, you will need to initialize and format it in Disk Management before it appears in File Explorer.
What You Cannot Upgrade: GPU, CPU, and Screen Limits
The GPU is soldered directly to the motherboard on essentially every gaming laptop, a design choice manufacturers make to reduce chassis thickness and improve thermal contact between the die and the vapor chamber. This means the graphics performance tier you buy is the graphics performance tier you keep for the life of the laptop; there is no aftermarket MXM GPU module ecosystem for consumer gaming laptops the way there was on some workstation models over a decade ago.
The CPU is similarly soldered (BGA-mounted) on nearly all current gaming laptops, including budget and mid-range models. A small number of enterprise or workstation laptops still use socketed, replaceable mobile CPUs, but this is not something to expect or plan around when buying a gaming laptop, and most buyers will never encounter a socketed option in this category.
The display panel’s native resolution and maximum refresh rate are fixed unless your exact chassis has a documented, community-verified alternate panel option, which is rare and typically limited to specific 15 and 17 inch gaming models where the manufacturer sold the same chassis with two different panel trims. Attempting a panel swap without confirmed compatibility risks a non-functional display with no clear point of failure to diagnose.
Battery capacity is fixed to whatever cell size fits the chassis; there is no “bigger battery” upgrade path the way there sometimes is on older ThinkPad-style business laptops with swappable external batteries. The only realistic way to improve battery runtime after purchase is software-level (power plan tuning, GPU power limit adjustment) rather than hardware.
Because these limits are permanent, the smartest upgrade strategy is buying slightly ahead of your current needs on GPU and CPU tier at purchase time, then treating RAM and storage as the flexible components you top up later as your needs grow, rather than expecting to grow into a laptop the way you might with a desktop.
Troubleshooting After an Upgrade
If the laptop will not power on after reassembly, the most common cause is an improperly seated RAM module or a loose panel screw pressing on an internal connector; power off, remove the bottom panel, and reseat both the RAM and SSD firmly before checking for any screw that seems too long for its hole, which can pierce a ribbon cable or press against the motherboard.
If the system boots but Windows reports the wrong RAM capacity (for example 16GB installed but only 8GB usable), check Task Manager’s Performance tab for “Hardware reserved” memory, which is normal in small amounts (under 1GB) but a larger discrepancy usually means one module is not seated and the system is running in single-channel mode on the other slot alone.
If a new SSD is not detected at all, first confirm in Disk Management that it needs initializing (a new, blank drive will not appear in File Explorer until formatted), and if it does not appear there either, power off and reseat the drive, checking that the retaining screw is snug but not over-tightened, since an over-tightened screw can flex the drive’s PCB enough to break the connector’s contact.
If performance feels unchanged after a RAM upgrade, confirm dual-channel mode is active using CPU-Z’s SPD tab, which will show both slots populated with matching timings; a laptop running in single-channel mode with two mismatched sticks will show little to no improvement over the original single-stick configuration despite the higher total capacity.
If the laptop runs unusually hot or throttles sooner than before your upgrade, check that you did not disturb a heat pipe or fan cable while working near the RAM and SSD slots, since some chassis route cooling components close to the storage bay, and a loosened heat pipe contact is a common but overlooked side effect of an otherwise successful upgrade.
Readers weighing whether to upgrade an existing laptop or simply buy new should compare the cost of a $150 to $220 RAM and SSD refresh against the best gaming laptops under $1,000, since a three-year-old machine with a weak GPU rarely benefits enough from a memory and storage upgrade alone to justify skipping a generational leap. For students specifically balancing budget against upgrade headroom, our guide to the best gaming laptops for students flags which current models leave an empty second RAM slot from the factory. If you are shopping secondhand, our best refurbished gaming laptop picks note which listings already include upgraded RAM or storage as a value signal. And if battery runtime factors into your upgrade-versus-replace decision, see our best gaming laptop battery life roundup for how much runtime you would gain by replacing rather than upgrading.
Frequently Asked Questions
Can I upgrade the graphics card in a gaming laptop?
Almost never. Since roughly 2020 the vast majority of gaming laptops solder the GPU directly to the motherboard, so there is no card to remove or swap, and the small number of machines with MXM slots are workstation-class exceptions that most shoppers never encounter, so budget for the GPU tier you need when buying rather than assuming a later upgrade.
Does upgrading RAM void my laptop warranty?
In most cases no, because manufacturers design a bottom access panel specifically for RAM and storage swaps, but always check your specific model’s service manual first, since a handful of ultra-thin laptops solder RAM to the board and opening the chassis on those can trigger a warranty flag even if nothing is damaged.
How much does it cost to upgrade RAM and storage myself?
A 16GB DDR5 SO-DIMM kit typically runs $45 to $75, and a 1TB NVMe Gen4 SSD runs $60 to $90, so a full 32GB plus 2TB upgrade usually lands between $150 and $220 in parts, which is far cheaper than paying a manufacturer’s built-to-order upgrade fee at purchase time.
Will upgrading RAM or storage improve my gaming FPS?
Storage upgrades reduce load times and stutter from texture streaming but rarely change average FPS, while RAM upgrades mainly help if you were running below 16GB and hitting swap-to-disk slowdowns during modern titles, so treat both as smoothness and multitasking fixes rather than a frame rate boost.
What tools do I need to open a gaming laptop?
A Phillips #00 or #0 precision screwdriver covers nearly every laptop screw, plus a plastic pry tool or old credit card to separate the bottom panel clips without scratching the chassis, and an anti-static wrist strap is worth the five dollars if you plan on doing this more than once.